Introduction
There is something deeply satisfying about standing back and looking at a freshly cleaned car gleaming in the sunlight. If you have ever paid for a professional car wash and thought, “I could do this myself,” you are absolutely right. Learning how to wash a car at home is not only one of the most cost-effective skills you can pick up as a car owner, but it also gives you far more control over the quality of the clean you get.
Professional car washes, while convenient, often use stiff brushes that leave fine scratches on your paint, recycle dirty water, and rush through the process. When you know how to wash a car at home the right way, you get to take your time, use the right products, and treat your vehicle with the care it truly deserves. Whether you drive a beat-up old commuter or a showroom-worthy weekend toy, the process is the same — and it is easier than you think.
In this complete guide, you will learn everything from the supplies you need to the exact steps professionals follow. By the end, you will have everything you need to keep your car looking clean and fresh every single week without ever needing to book a car wash appointment again. Mastering how to wash a car at home properly takes just a little practice and the right technique.
Why You Should Learn How to Wash a Car at Home
Before diving into the how-to, it helps to understand why regular car washing matters beyond just appearances. Anyone who wants to know how to wash a car at home should first appreciate what is actually at stake for their vehicle.
Paint protection is the biggest reason. Road grime, bird droppings, tree sap, and bug splatter are mildly acidic or corrosive. When left on your paint, they eat through the clear coat over time, leading to dull, damaged paint that is expensive to restore. Washing your car regularly removes these contaminants before they cause permanent harm.
Resale value is another major factor. A car that has been consistently maintained and kept clean holds its value significantly better than one that has been neglected. If you plan to sell your vehicle at some point, a clean, well-maintained exterior signals to buyers that the car has been cared for inside and out.
Rust prevention is especially important for people who live in regions where roads are salted during winter months. Road salt clings to the undercarriage and wheel wells of your car and promotes rust, which can cause serious structural damage if ignored. Knowing how to wash a car at home thoroughly — including the undercarriage — can dramatically slow this process.
Cost savings are enormous over time. The average professional car wash costs anywhere from $10 to $30 per visit. Once you know how to wash a car at home, you are only spending a few dollars on soap and water each time. (6)
Finally, there is the simple matter of personal pride. Driving a clean car just feels good.
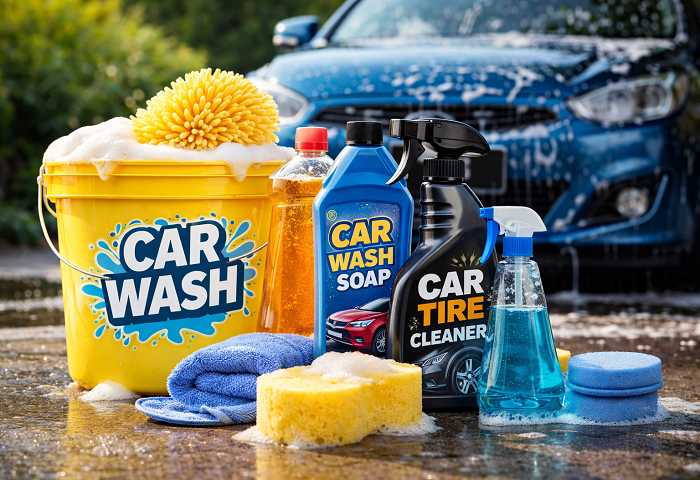
What You Need: Supplies to Wash a Car at Home
Getting the right supplies before you start is critical. Using dish soap, old rags, or a single dirty bucket are common mistakes that can scratch your paint and leave water spots. Here is a full list of what you need to wash a car at home properly.
Two buckets — This is the most important piece of equipment. One bucket holds your soapy wash solution, and the other is strictly for rinsing your wash mitt before reloading with soap. This prevents you from spreading grit and dirt back onto your paint.
Car wash soap — Never use dish soap or household cleaners. They strip wax and damage your clear coat. Use a dedicated pH-neutral car wash shampoo designed specifically for automotive paint.
Microfiber wash mitt — Far gentler than sponges, microfiber mitts trap dirt particles inside their fibers rather than dragging them across your paint. This is one of the most important tools when learning how to wash a car at home without causing swirl marks.
Microfiber drying towels — Large, soft, and ultra-absorbent. A quality microfiber drying towel prevents water spots and is much safer than air drying or using old bath towels.
Wheel and tire cleaner — Brake dust is highly corrosive and bonds tightly to your wheels. Use a dedicated wheel cleaner spray and a stiff-bristle wheel brush for this job.
Tire brush and wheel brush — Two separate brushes help you clean both the rubber tire surface and the wheel face without cross-contaminating.
Grit guards — These sit in the bottom of your buckets and allow dirt to sink below the guard, preventing you from picking it back up with your mitt.
Garden hose with adjustable nozzle — A pressure washer is optional but helpful. A standard hose with a good spray nozzle works perfectly well when you wash a car at home.
Car wax or spray detailer (optional but recommended) — Finishing with a quick wax coat or spray detailer adds shine and a light layer of paint protection.
Glass cleaner — Dedicated automotive glass cleaner leaves windows completely streak-free.
Interior cleaning supplies — If you plan to tackle the inside, grab an interior detailing spray, microfiber cloths, a small vacuum, and a brush for vents.
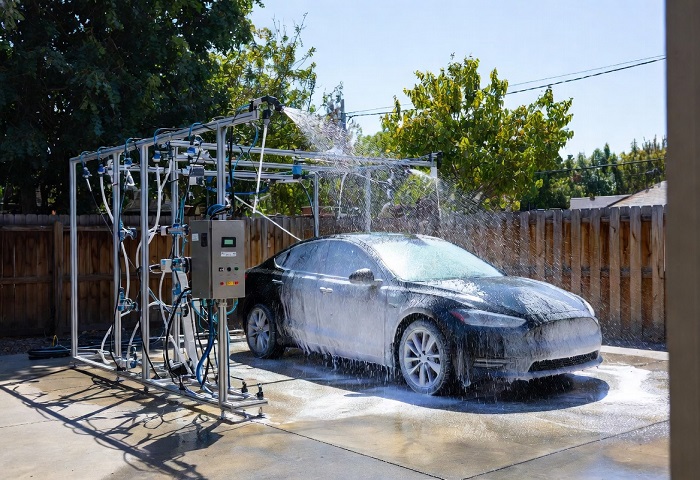
Step-by-Step Guide: How to Wash a Car at Home
Now that you have your supplies ready, let us walk through the exact process. This is the complete method for how to wash a car at home that delivers professional-quality results every time.
Step 1: Choose the Right Time and Place
This step sounds obvious, but timing matters more than most people realize. Never attempt to wash a car at home in direct sunlight or when the metal panels are hot to the touch. Heat causes water and soap to dry too fast, leaving behind soap residue and water spots that are frustrating to remove.
The ideal conditions for washing a car at home are a shaded area or an overcast day. Early morning or late afternoon are good windows if shade is not available. A flat, paved driveway or parking area works best to give you room to move around the vehicle comfortably.
Check that your water source can reach all sides of the vehicle before you start, and keep your supplies organized and within easy reach.
Step 2: Rinse the Entire Car First
Before you touch the car with a mitt or cloth, give the entire vehicle a thorough rinse from top to bottom using your hose. This pre-rinse is a non-negotiable part of how to wash a car at home safely, because it removes loose dirt, dust, and debris that would otherwise scratch your paint the moment you start scrubbing.
Pay particular attention to the wheel wells, door jambs, rocker panels, and the front bumper where bugs and road grime accumulate most heavily. A strong spray behind the mirrors and around the antenna base will flush out trapped dirt.
Rinsing top to bottom is always the right direction. Water and dirt flow downward, and you never want to rinse a dirty lower panel onto a clean upper one.
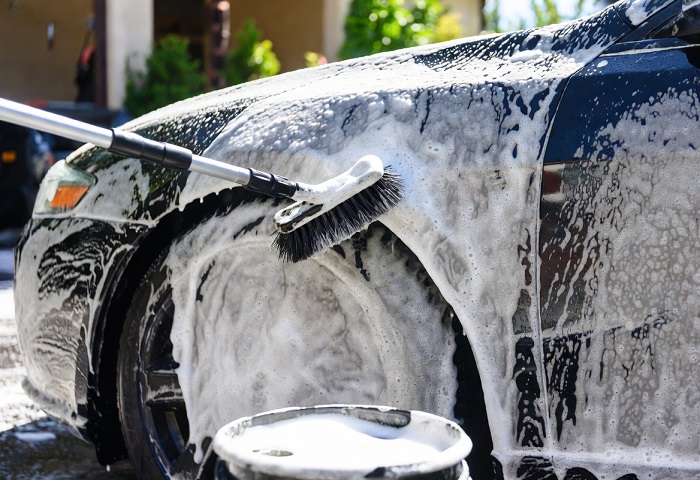
Step 3: Clean the Wheels and Tires First
Always clean your wheels before washing the body of the car. This is one of the most overlooked tips for how to wash a car at home correctly. Wheel cleaning is messy, and the spray from your wheel cleaner and brush can splatter onto your paint. If you clean the wheels last, you risk getting brake dust and grime on an already clean car body.
Spray your wheel cleaner generously onto each wheel and let it sit for 30 to 60 seconds to break down brake dust. Use your wheel brush to scrub the face of the wheel, getting into the spokes and around the lug nuts. Use a separate, stiffer brush to scrub the tire sidewalls.
Rinse each wheel thoroughly before moving on to the next. Some wheel cleaners change color as they react with iron particles from brake dust, giving you a visual confirmation that the product is working.
Step 4: Prepare Your Two Buckets
Fill one bucket with clean water and your recommended amount of car wash shampoo. Most shampoos foam up considerably, so follow the label instructions. Fill the second bucket with plain, clean rinse water and drop a grit guard into the bottom of each bucket.
The two-bucket method is the single most important technique behind how to wash a car at home without scratching the paint. You dip your mitt into the soapy bucket, wash a section of the car, then rinse the mitt in the clean water bucket before reloading with soap. The dirt and grit you have lifted off the car stays in the rinse bucket and never returns to the paint surface.
Step 5: Wash the Car from Top to Bottom
Start at the roof and work your way down. This is the safest sequence because the lower panels of a car collect the most road dirt and grit. Washing the cleaner upper sections first prevents cross-contamination — another key principle of how to wash a car at home the right way.
Use light, straight back-and-forth strokes with your microfiber mitt rather than circular motions. Circular scrubbing creates swirl marks in the paint that catch light and dull your finish over time. Straight lines are always preferred.
Divide the car into sections: roof, hood, trunk, upper doors, lower doors, front bumper, rear bumper. Rinse your mitt in the rinse bucket and reload it with soapy water each time you complete a section. Never let soap dry on the paint — if you are washing a car at home on a warm day, rinse each section with clean water immediately after scrubbing.
Step 6: Rinse the Entire Car Thoroughly
Once you have washed every panel, give the entire car a final, thorough rinse. Start from the top again and work your way down. Make sure all soap residue is completely rinsed away, because dried soap leaves a white, chalky film that is difficult to remove later.
Pay extra attention to crevices, door handles, side mirrors, and emblems where soap tends to get trapped. Running your finger along panel edges while water flows over them helps flush out every last bit of suds. This thorough rinse is a critical part of how to wash a car at home and get a truly clean result.
Step 7: Dry the Car Immediately
Drying your car immediately after rinsing is one of the most important steps people skip when they wash a car at home. Letting a car air dry in the sun produces water spots — mineral deposits from your tap water that dry on the paint and can etch into the clear coat over time.
Use a large, clean microfiber drying towel and blot or drag it gently across the surface. Never rub the car aggressively while drying, as this can cause light scratching if there is any remaining dust on the surface.
Start from the roof and work downward. Some detailers prefer using a leaf blower or car dryer to blast water out of crevices and gaps before towel drying, which prevents water from draining out of door handles and mirrors onto an already dry surface minutes later.
Step 8: Clean the Windows and Glass
Spray a dedicated automotive glass cleaner onto your microfiber cloth first, then wipe the glass rather than spraying directly on the window. This gives you better control and prevents overspray from getting on your freshly washed paint. Glass cleaning is a finishing detail that separates a good home car wash result from a great one.
Use one side of the microfiber cloth in vertical strokes, then flip to the clean side and wipe horizontally. This cross-pattern technique makes it easy to see if any streaks remain and which side of the glass they are on.
Do not forget the driver and passenger side mirrors, the rear window, and the sunroof glass if your car has one.
Step 9: Apply Wax or Spray Detailer
This step is optional but highly recommended. A quick spray detailer can be applied immediately after drying to add shine and a light layer of protection in just a few minutes. If you want to take your results to the next level after learning how to wash a car at home, applying wax is the natural next step.
For deeper, longer-lasting protection, a paste or liquid car wax applied every three to four months seals the paint, repels water, and makes future home car washes much easier because dirt and grime have a harder time bonding to a waxed surface.
Apply wax in small sections using an applicator pad, let it haze over, then buff it off with a clean microfiber towel using straight strokes. A properly waxed car should bead water off the surface when it rains.
Common Mistakes People Make When They Wash a Car at Home
Even experienced car owners make these mistakes. Being aware of them will help you protect your paint and get better results every single time you wash a car at home.
Using dish soap or household cleaners is probably the single most common error. These products are formulated to cut through grease aggressively, which means they also strip the protective wax off your paint with every wash. Always use a product specifically designed for automotive use when you wash a car at home.
Washing in one bucket is a classic beginner mistake. Without a separate rinse bucket, you are constantly reintroducing the grit you just removed back onto your mitt and then back onto your paint. The two-bucket method is non-negotiable for scratch-free results.
Skipping the pre-rinse causes scratches because loose particles get dragged across the surface the moment you press your mitt against the car. Anyone serious about learning how to wash a car at home should make the pre-rinse an unbreakable habit.
Using circular scrubbing motions creates swirl marks that are frustratingly visible in direct sunlight. Train yourself to always use straight, linear strokes every time you wash a car at home.
Letting the car air dry results in water spots. Always follow up your rinse with a dedicated microfiber drying towel.
Washing the body before the wheels risks splattering brake dust contamination onto your clean paint. Wheels always come first when you wash a car at home correctly.
How Often Should You Wash a Car at Home?
Now that you know how to wash a car at home, the next question is how often you should do it. A general rule of thumb is every two weeks. However, the right frequency depends on your environment and driving habits.
If you park outdoors under trees, live near the coast where salt air is prevalent, commute through heavy traffic, or drive on dirt roads regularly, you may want to how to wash a car at home every week. More frequent washing in these conditions protects your paint and undercarriage from accelerated damage.
In winter months, especially in areas where roads are salted, how to wash a car at home more frequently helps protect against rust and corrosion. After a long road trip, a thorough home wash is always a good idea to remove bug splatter and highway grime before they have time to damage the paint.
How to Wash a Car at Home: Interior Quick Refresh
Since you are already out there with your supplies, spending an extra fifteen minutes on a quick interior clean makes a big difference. Many people who master how to wash a car at home eventually extend their routine to include the interior as well.
Use a handheld vacuum to remove crumbs and debris from the seats and carpets. Wipe down hard surfaces like the dashboard, center console, and door panels with an interior detailing spray and a microfiber cloth.
Clean the inside of all windows with your glass cleaner, and if you have leather seats, a quick wipe-down with a leather conditioner keeps the material soft and prevents cracking.
A clean interior makes the whole car feel newer, and it takes surprisingly little time when you are already in the habit of a regular home car wash routine.
Pro Tips for a Better Result When You Wash a Car at Home
Once you have the basics of how to wash a car at home mastered, these extra tips will help you get even better results.
Use a foam cannon if you have a pressure washer. Pre-soaking your car with thick foam before you touch it with a mitt loosens surface grime dramatically and makes the wash safer for your paint.
Wash your microfiber mitts and towels separately from other laundry and avoid fabric softener. Softener reduces the absorbency and cleaning ability of microfiber over time.
Clay bar your paint twice a year after washing. A clay bar removes bonded contaminants like industrial fallout, rail dust, and tree sap that regular washing cannot remove. Run your hand over your clean paint — if it feels rough like sandpaper, your paint needs claying.
Work in the shade every single time. Heat is the enemy of a good result when you wash a car at home, and no amount of technique can fully compensate for soap drying on hot paint before you can rinse it.
Dedicate specific towels for specific tasks — separate towels for drying, glass, and wax buffing. Cross-contaminating towels is a subtle but common cause of scratches and streaks.
Final Thoughts
Learning how to wash a car at home is one of the most rewarding and practical car care skills you can develop. With the right two-bucket method, quality microfiber tools, and a gentle car wash shampoo, you can consistently achieve results that rival a professional detailing job at a fraction of the cost.
The how to wash a car at home takeaways are simple: always pre-rinse, wash from top to bottom, use the two-bucket method, dry immediately with a microfiber towel, and clean your wheels first. Follow these steps every two weeks, and your car will stay protected, look great, and hold its value far better over time.
Once you get comfortable with the basic process, you can explore more advanced techniques like clay bar decontamination, paint correction, and ceramic coating — but for now, a thorough, careful home car wash done consistently is all you need to keep your vehicle in excellent condition for years to come.