Introduction
There is something deeply satisfying about stepping back and admiring a spotless, gleaming vehicle that you just cleaned entirely with your own two hands. A self done car wash is no longer simply a lazy Sunday hobby — for millions of car owners worldwide, it has become the smartest, most cost-effective, and most rewarding way to maintain a vehicle’s appearance and protect its long-term resale value.
Whether you are tired of paying inflated prices at commercial stations, worried about the swirl marks that automated brush machines leave on your paintwork, or you simply enjoy getting hands-on with your vehicle, learning to perform a proper self done car wash is one of the best decisions any car owner can make. It hands you total control over every product, every technique, and every inch of care applied to your car.
In this detailed guide, we cover everything you need to execute a flawless DIY car wash — from assembling the right toolkit and selecting the best car shampoo, to mastering the two-bucket method, cleaning wheels thoroughly, and finishing with protective wax that keeps your car looking showroom-fresh for weeks.
Why a Self Done Car Wash Beats the Automatic Car Wash Every Time
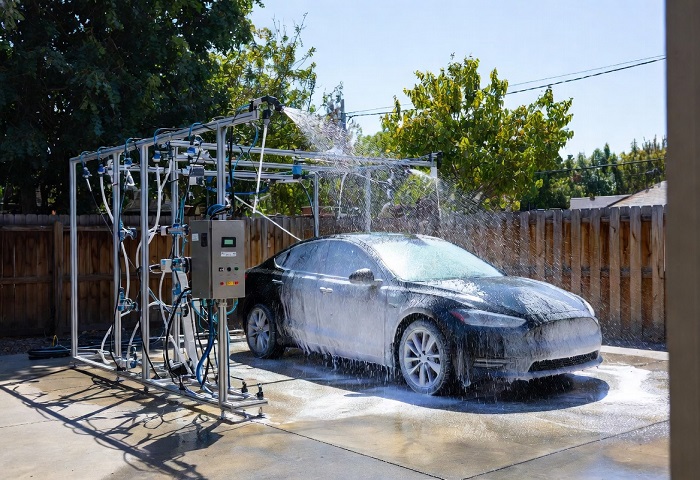
Before we get into the how-to, let us consider why the self done car wash consistently outperforms the automatic car wash in every meaningful category — paint safety, depth of clean, long-term protection, and overall cost.
Automated tunnel washes use large rotating brushes and high-pressure jets that grind dirt particles into your paintwork, leaving behind fine scratches and swirl marks that accumulate over time and permanently dull your finish. Even touchless machines rely on aggressive chemical detergents that strip protective wax layers and fade paint over repeated use.
A self done car wash allows you to use gentle, pH-balanced car shampoos paired with ultra-soft microfiber wash mitts that glide across paint without causing abrasion. You control the water pressure, the dwell time of every product, and the care given to vulnerable areas like door handles, painted trim, and rubber seals. The result is a safer, more thorough, and more personalised clean than any machine can deliver.
From a financial standpoint, the cost savings of washing your own vehicle at home are undeniable. A single visit to a premium hand-wash detailing centre can cost $30 to $100 or more, while a home wash costs a fraction of that once you own the right supplies. Over twelve months, those savings add up to several hundred dollars.
Beyond the practical benefits, there is also the genuine pleasure of this hands-on cleaning experience. Many car enthusiasts find washing, polishing, and waxing their vehicle a meditative, hands-on ritual that deepens their connection to their car and gives them real pride in how it looks every day.
Essential Tools and Supplies for a Self Done Car Wash
One of the most common mistakes beginners make when attempting their first self done car wash is cutting corners on equipment. Using dish soap, an old household sponge, or a plain garden hose without a proper nozzle might seem like reasonable shortcuts, but they lead to scratched paint, streaky glass, and a result that looks worse than before you started.
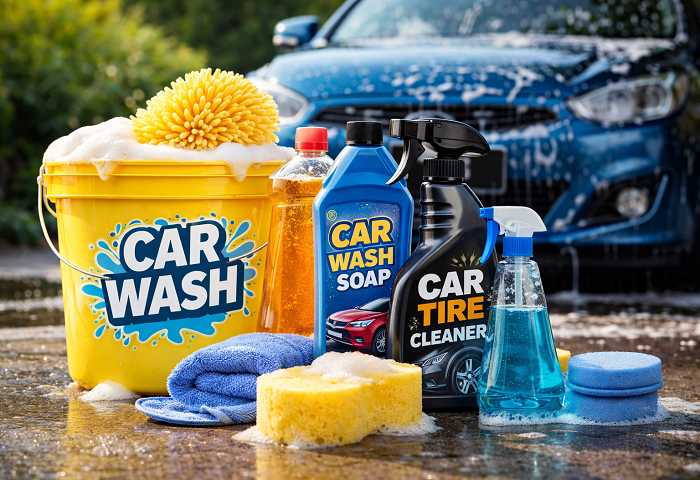
Here is every item you need to set yourself up for a professional-quality DIY car wash at home:
Two Clean Buckets
The two-bucket method is the single most important technique in any self done car wash. One bucket holds your soapy car shampoo solution and the other holds plain clean rinse water. Every time you dip your wash mitt back into the soap bucket, you first rinse it in the clean water to shed any grit it has collected. This one discipline dramatically reduces the risk of dragging abrasive particles across your paintwork.
Quality Car Shampoo
Never use dish soap or household detergents when washing your car at home. These products strip oils and grease — and will just as readily strip your car’s protective wax coating, damage rubber seals, and dry out plastic trim. A dedicated car shampoo is pH-balanced, formulated to clean without harming protective coatings, and produces thick lubricating foam that lets your mitt glide safely across every painted surface.
Microfiber Wash Mitt
The microfiber wash mitt is the heart of any safe self done car wash. Its deep, plush fibres trap and lift dirt away from the paint rather than grinding it across the clear coat. It is the single most important piece of equipment for a scratch-free result, and no responsible home car wash should ever be attempted without one.
Microfiber Drying Towels
After rinsing, you need to dry the car quickly to prevent water spots — especially in hard-water areas. A large, ultra-absorbent microfiber drying towel is the correct tool for this phase of the wash. Never use regular bath towels, whose rough cotton fibres can scratch your clear coat and leave behind lint deposits across your panels.
Wheel Cleaner and Detailing Brushes
No self done car wash is truly complete without properly cleaned wheels. Brake dust, road grime, tar, and mud accumulate heavily on alloy surfaces and inside wheel barrels. A dedicated wheel cleaner spray paired with a set of stiff detailing brushes will clean every spoke, barrel, and tyre sidewall without scratching the alloy finish.
Ammonia-Free Glass Cleaner
A streak-free, ammonia-free glass cleaner is essential for any thorough home car wash because ammonia degrades window tinting and dries out rubber seals over time. Applied with a clean dedicated microfiber cloth, a quality glass cleaner leaves every window crystal clear and perfectly streak-free from every angle.
Hose with Adjustable Nozzle or Pressure Washer
A reliable water supply is the backbone of a successful home car wash. A pressure washer is highly effective for blasting mud from wheel arches and heavily soiled lower panels, but use it on a low-to-medium setting at a safe distance from paintwork to avoid forcing water behind rubber trim seals.
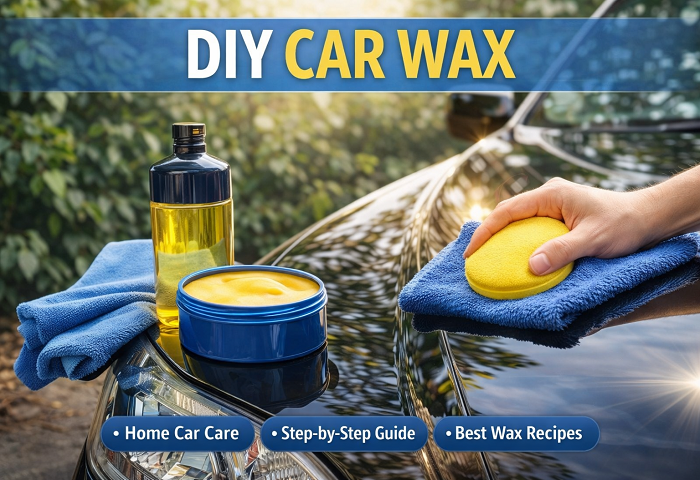
Car Wax or Paint Sealant
The finishing touch of any great home car wash is a coat of quality carnauba wax or synthetic paint sealant. This step locks in shine and creates a protective barrier against UV rays, rain, bird droppings, tree sap, and environmental contamination that would otherwise bond directly to bare paint.
Step-by-Step Guide to the Perfect Self Done Car Wash
Now that your supplies are assembled, here is the complete process for performing an outstanding wash from start to finish.
Step 1: Choose the Right Time, Place, and Conditions
Every successful self done car wash starts with choosing the right environment. Never wash your car in direct sunlight or when the panels are hot to the touch. Heat causes car shampoo to dry on the paintwork before you can rinse it off, leaving soap residue and water spots that are very difficult to remove afterward.
The ideal conditions for a self done car wash are a shaded area during the cooler early morning or late afternoon hours. Work on a clean, level driveway or paved area, and avoid washing on grass or loose gravel that could splash contamination back onto your paintwork mid-wash.
Step 2: Pre-Rinse the Entire Vehicle
Before anything touches your car, give it a thorough top-to-bottom pre-rinse with your hose or pressure washer. This step is non-negotiable in any properly executed self done car wash — it removes loose dirt, dust, dried bird droppings, and road debris so you are not dragging them across your paint with your mitt. Pay special attention to lower panels, wheel arches, door jambs, and behind the wheels where grime accumulates most heavily.
Step 3: Start with the Wheels
In every well-organised self done car wash, the wheels are always cleaned before the body panels. Wheels are the most contaminated part of the car, and if you clean them last, contaminated spray will splash back onto your freshly washed bodywork and undo all your hard work.
Spray your wheel cleaner generously, allow it to dwell for the recommended time, then scrub every spoke, barrel, and tyre sidewall before rinsing each wheel fully before moving to the next.
Step 4: Fill Your Two Buckets and Begin Washing
With the wheels clean, fill your wash bucket with warm water and car shampoo, and your rinse bucket with plain cold water only. Load your microfiber mitt and begin the self done car wash from the roof, working downwards through the upper panels, doors, lower panels, and bumpers in a systematic sequence.
Always use straight, overlapping strokes rather than circular motions — circles create swirl marks in your clear coat that catch light from every angle and make paint look permanently hazy. After every one or two panels, rinse your mitt in the clean bucket before reloading it with soapy water. This rinsing discipline makes the two-bucket method the gold standard of safe self done car wash technique — your mitt must be clean and safe before it touches your paint again.
Step 5: Rinse Thoroughly
Once every panel is washed, give the entire car a long, thorough rinse from the roof downwards. Every trace of shampoo must be flushed away completely — residual soap left on the paint dries into a dull, hazy film that undermines the entire result of your wash. Use a gentle, steady flow of water that encourages sheeting rather than a hard blast that leaves excessive droplets on the surface.
Step 6: Dry the Car Immediately
Quick, thorough drying is one of the most critical stages of any quality self done car wash. Water — particularly in hard-water areas — leaves dissolved mineral deposits that can etch into your clear coat if allowed to bake in warm weather.
Fold your large microfiber drying towel into quarters and lay it flat on each panel, patting gently to absorb standing water without dragging across the surface. Work from the roof downwards, finishing with door jambs, lower sills, and the boot lid.
Step 7: Clean All Glass Surfaces
With the bodywork clean and dry, a thorough car wash turns to the glass. Spray your ammonia-free glass cleaner on each window and wipe with a dedicated microfiber cloth — first in circular passes to lift all contamination, then in straight strokes to eliminate any streaking. Always clean the inside of the windscreen and rear window too, where an oily interior haze steadily builds up over time and impairs visibility.
Step 8: Apply Wax or Paint Sealant
The final step of an exceptional self done car wash is applying a coat of carnauba wax or synthetic paint sealant to protect all that clean, freshly revealed paintwork. Apply a small amount to a foam applicator pad and work it across one panel at a time in thin, overlapping strokes. Allow it to haze over, then buff away cleanly with a fresh, plush microfiber towel.
The result is immediate — your paintwork takes on a rich, glassy depth and clarity that no basic wash alone can produce. Every future self done car wash also becomes significantly easier because contaminants have far less grip on a properly protected surface.
Pro Tips to Elevate Your Self Done Car Wash Results
Once the core process is comfortably second nature, these professional-level techniques will push your car wash results to a noticeably higher standard:
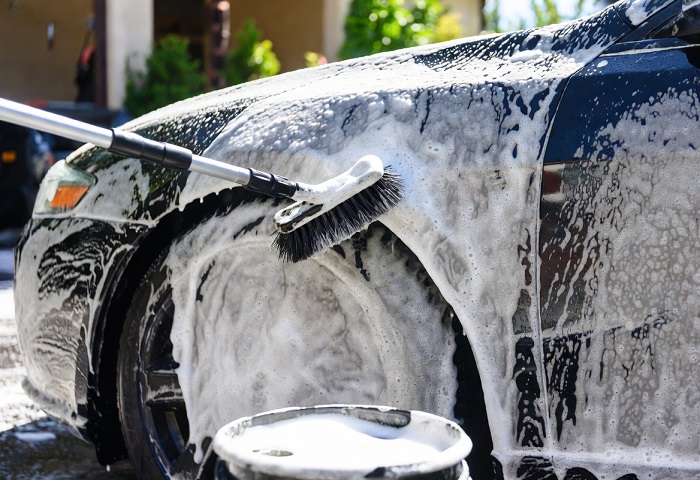
Use a snow foam pre-wash. A foam cannon attached to your pressure washer coats the entire car in thick, clinging foam that chemically loosens surface contamination before your mitt makes contact with the paint. This is one of the most valuable additions to any self done car wash routine — it reduces the contamination load your mitt needs to handle and significantly lowers the risk of inducing fine scratches.
Try a waterless wash for light dust. When your vehicle only has a light coating of dust between full washes, a waterless car wash spray is a fast, practical, and eco-friendly solution. Spray it onto the panel, allow a brief dwell time to encapsulate the particles, then wipe carefully with a clean microfiber towel. It is perfect for quick maintenance cleans between your regular self done car wash sessions.
Decontaminate your paint twice a year. Even after a thorough wash, paintwork can harbour bonded iron fallout, tar deposits, and tree sap that ordinary car shampoo cannot remove. An iron decontamination spray followed by a clay bar treatment removes all bonded particles, leaving your paint silky smooth and perfectly ready to accept fresh wax for maximum protection.
Invest in high-quality microfiber. The grade of your towels and mitts makes a tangible, visible difference to every wash result. Look for products rated 400 GSM or above for maximum softness and absorbency, and launder them after every session in a fragrance-free detergent without fabric softener, which coats fibres and permanently reduces their cleaning performance.
Common Mistakes That Ruin a Self Done Car Wash
Even careful car owners fall into bad habits over time. Here are the most frequent errors that quietly compromise an otherwise thorough home car wash:
Washing in circular motions. Circular scrubbing creates swirl marks in your clear coat that catch light at every angle and make paint look permanently dull. Always work in straight, linear strokes — no exceptions during any home car wash.
Using only one bucket. A single-bucket approach turns your wash water into a soup of grit and contamination within the first few panels. Always use the two-bucket method — it is the most fundamental protective measure in any responsible self done car wash.
Skipping the initial pre-rinse. Touching the car with a wash mitt before rinsing off loose surface dirt is the most common cause of fine scratches. The pre-rinse step cannot be skipped or abbreviated in any properly executed home car wash.
Letting the car air dry. Air drying leaves mineral water spots across every panel. Always follow your wash immediately with a thorough microfiber dry.
Washing too infrequently. Aim for a thorough self done car wash at least every two to three weeks. Allowing contamination to bond deeply over months makes subsequent cleaning more difficult, more time-intensive, and riskier for your paint.
The Environmental Impact of Washing Your Car at Home
One important consideration that car owners often overlook is the environmental footprint of washing your car at home. Commercial car washes in many regions are legally required to filter and recycle their wastewater, whereas runoff from a home driveway carries soap residue, heavy metals from brake dust, and oil traces directly into storm drains and local waterways.
To wash more responsibly, choose biodegradable, eco-certified car shampoos, wash on a permeable surface where possible to allow ground absorption, and minimise water use by turning your hose off completely between rinse stages. Waterless and rinse-free spray products are also excellent eco-conscious alternatives for maintenance cleans between full detail sessions.
How Often Should You Perform a Self Done Car Wash?
For most car owners under typical conditions, a thorough self done car wash every two to three weeks represents the ideal maintenance frequency. It keeps paint clean and prevents the accumulation of damaging bonded contamination without placing an unreasonable demand on your time.
If you live near the coast where salt air and sea spray accelerate corrosion, or in a busy urban area with high industrial fallout and heavy traffic pollution, stepping up to a weekly self done car wash is a worthwhile commitment. The time investment is modest, but the long-term benefit to your paint, body panels, and vehicle resale value is significant.
Between full washes, a quick rinse and wipe-down of the lower panels and any obviously soiled areas takes under 20 minutes and keeps the car looking sharp. Reapply your protective wax every three to four months, or whenever water stops forming clean beads on your paintwork — the surest sign the protective layer has worn thin.
Conclusion
A self done car wash is genuinely one of the most practical, rewarding, and cost-effective skills any car owner can develop. With the right products, the right process, and consistent practice, the results you achieve at home will match and frequently exceed what a professional hand-wash service provides — because no detailer brings the same personal care and investment to your vehicle as you do.
The initial outlay on quality microfiber, car shampoo, wax, and detailing brushes pays for itself within just a few months compared to the ongoing cost of commercial car washing, and the long-term benefits to your paintwork condition and vehicle resale value are genuinely significant.
So fill your two buckets, pick a cool shaded morning, and put this complete guide to work. A clean car is not merely about appearances — it is about protecting a significant investment, maintaining genuine pride of ownership, and experiencing the deep satisfaction of doing something properly with your own hands. That is the true spirit of the self done car wash, and once you see the results for yourself, the automated tunnel will never tempt you again.