Car Wash Self Wash: The Complete Guide to a Professional Finish at Home
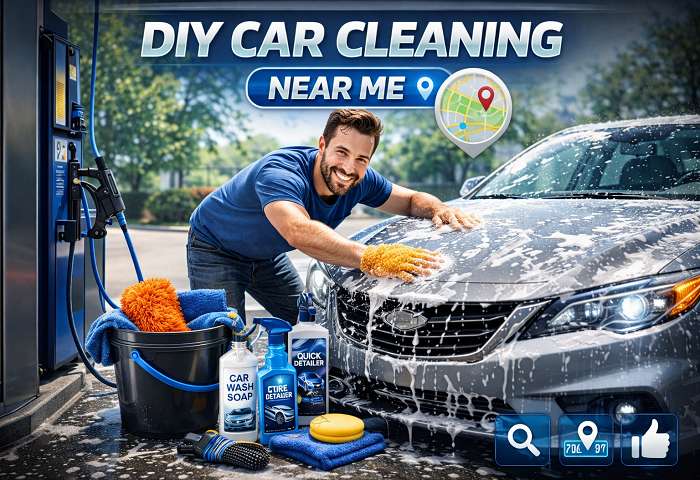
There is a reason millions of drivers every week pass the automatic tunnel wash, drive past the detailing shop, and instead search for a reliable car wash self wash option close to home. That reason is simple: when you wash your own car correctly, the results are better, the process is safer for your paint, and the cost over time is a fraction of what commercial alternatives charge. A proper car wash self wash routine — done with the right technique, the right tools, and the right sequence of steps — consistently produces a cleaner, better-protected vehicle than any machine or rushed professional service can deliver.
This is the guide that covers everything. From understanding what a car wash self wash actually involves, to finding the best self-serve facilities near you, to building a complete home wash station, to following the exact step-by-step process that professional detailers use every day. Whether you are picking up a wash mitt for the first time or looking to refine a routine you have had for years, every section of this guide is built around getting you a result you will be genuinely proud of.
What Is a Car Wash Self Wash and Why Does It Matter?
Before diving into process and technique, it is worth being clear about what the car wash self wash approach actually means and why it has become the preferred choice for car enthusiasts, budget-conscious drivers, and anyone who takes the condition of their vehicle seriously.
A car wash self wash refers to any situation in which the vehicle owner or driver handles the washing process themselves rather than handing the car off to a professional service or running it through an automated machine. This includes hand washing at home using a bucket and hose, using a coin-operated self-service bay, visiting a dedicated self-serve car wash park, or setting up a complete home detailing station in a driveway or garage.
What separates the car wash self wash from a professional or automated service is not just the hands doing the work — it is the control that comes with doing it yourself. You choose the products. You decide how long to spend on each panel. You apply the techniques that actually protect the paint rather than the shortcuts that save commercial operations time and money. That control is the foundation of everything that makes a car wash self wash superior in both outcome and long-term paint health.
Why Automatic Car Washes Fall Short
Understanding why the car wash self wash approach outperforms automatic alternatives puts the value of the DIY method into sharp context. Most drivers underestimate how damaging commercial automatic car washes — particularly brush-based tunnel washes — are to their vehicle’s paintwork.
Rotary Brush Damage
The rotating brushes in tunnel car washes are among the most consistently paint-damaging tools in common use. These brushes are shared across hundreds of vehicles every day. They accumulate grit, debris, stone chips, and road contamination from every car that passes through before yours, and they drag all of that material across your clear coat with significant force. The result is a steadily accumulating network of swirl marks, micro-scratches, and surface marring that progressively dulls the depth and reflectivity of your paint.
A single pass through a brush-based automatic wash does measurable damage. Over months and years of regular use, the cumulative effect is dramatic — paint that looked deep and glossy starts to appear flat and lifeless, and colour-matched buffing becomes necessary far sooner than it should.
A car wash self wash using proper microfiber mitts and the techniques described in this guide introduces no abrasion of this kind. The paint is safer every single time.
Touchless Wash Chemical Aggression
Touchless automatic car washes are better for paint in that they avoid physical contact, but they compensate for the lack of agitation by using chemically aggressive high-alkaline or high-acid solutions to strip dirt from the surface. These chemicals work — but they also strip wax, sealant, and ceramic coating top layers with regular use, leaving paint unprotected far sooner than it should be.
A car wash self wash uses pH-neutral shampoo that cleans the paint without stripping its protection. Over time, this makes a significant difference in how long your protective layers last and how consistently your paint repels water and contamination.
Professional Detailing Shortcuts
Even professional detailing services — which are expensive — are not immune to quality issues. A detailer working on a tight schedule with back-to-back bookings will rush. Towels may not be as clean as they should be. Dilutions may be off. Certain panels or crevices may get insufficient attention. A car wash self wash has none of these pressures. You set the pace, apply the standard, and attend to every detail the way it deserves.
Finding the Best Car Wash Self Wash Locations Near You
For drivers who do not have driveway access or outdoor water availability, finding a quality local car wash self wash facility is the essential first step.
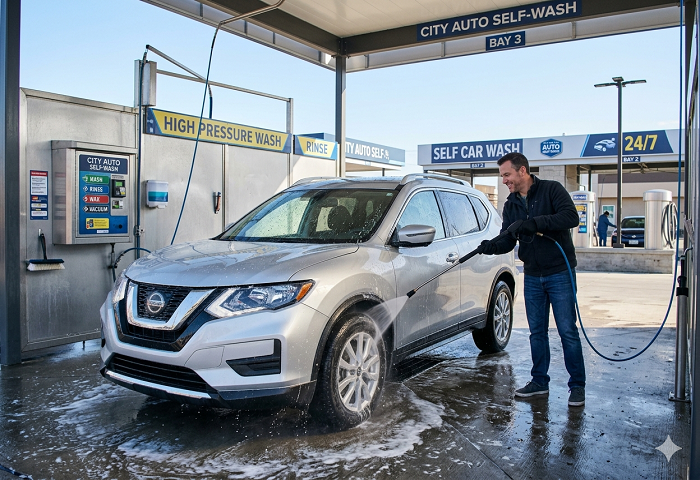
Coin-Operated Self-Service Bays
Coin-operated self-service car wash bays are the most widely available external car wash self wash option. Found at petrol stations, standalone car wash parks, and some retail car parks, these facilities provide high-pressure wash wands with multiple settings — pre-soak, high-pressure soap, rinse, and often a spot-free final rinse — for a metered coin or card payment.
The best coin-operated bays for a car wash self wash are those with high and consistent water pressure, a functioning pre-soak or foam setting, a genuine spot-free final rinse option, and a clean, well-maintained environment. Always assess the equipment condition before committing: a bay with low pressure, clogged nozzles, or broken functions will frustrate your process and undermine your results regardless of the technique you apply.
Self-Serve Car Wash Parks
Dedicated self-serve car wash parks represent the premium end of the external car wash self wash experience. These facilities typically offer individual covered bays with hot and cold water access, foam brush stations, dedicated wheel cleaning areas, vacuum stations with powerful suction, compressed air for drying crevices, tyre inflation equipment, and on-site product vending.
For drivers without home wash access who want the best possible car wash self wash result, a quality self-serve car wash park is the ideal environment. The bay dimensions are generally more generous, the equipment more reliably maintained, and the range of available functions closer to a professional setup than a standard coin-op allows.
How to Evaluate a Self-Serve Bay Before You Commit
When visiting a new car wash self wash facility for the first time, run a quick assessment before you start the meter. Test the pressure wand on the bay floor to check water pressure and nozzle function. Check that the soap setting produces actual foam rather than a thin, watery spray. Verify that the spot-free rinse setting is clearly labelled and functioning. Assess the bay floor — a clean floor indicates a well-maintained facility, while a floor caked in old soap residue and debris suggests the opposite.
A bay that passes this simple check earns a second visit. One that fails should send you to find a better car wash self wash option in your area.
Using Google Maps to Find Car Wash Self Wash Options
Google Maps is the most efficient tool for locating car wash self wash facilities near you. Search “self-service car wash near me,” “coin-operated car wash near me,” or “self-serve car wash near me.” Sort results by star rating and read the five most recent reviews for your top candidates. Pay attention to comments that specifically mention pressure quality, equipment reliability, spot-free rinse effectiveness, and bay cleanliness — these are the details that determine whether a facility is genuinely worth your time.
Setting Up Your Home Car Wash Self Wash Station
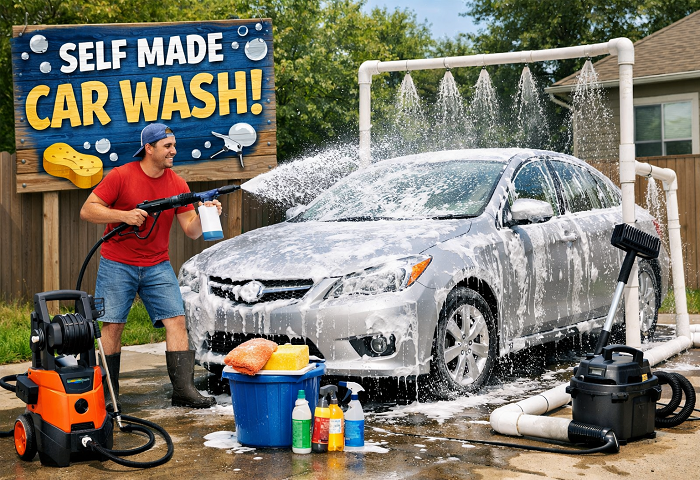
For drivers with driveway access, building a dedicated home car wash self wash station is one of the highest-value investments you can make in your vehicle’s long-term care. Once assembled, the home setup is cheaper per wash, more convenient, and produces consistently better results than any external facility.
Water Supply and Pressure Equipment
A standard outdoor garden tap with a quality hose fitted with a strong-flow adjustable nozzle is the baseline for home car wash self wash rinsing. It is adequate for most wash situations, particularly when combined with a foam gun attachment.
A domestic pressure washer rated between 1200 and 1600 PSI represents a significant upgrade. At this pressure level it provides excellent pre-rinse power, effectively removes loose contamination without risk to rubber seals or trim, and works well with a foam cannon attachment for pre-wash snow foam application. A pressure washer is not a requirement for a successful home car wash self wash setup, but it is the tool that most meaningfully elevates the quality of the pre-wash and rinse stages.
The Two-Bucket System
No single piece of equipment does more to protect paint during a home car wash self wash than the two-bucket system. The concept is straightforward but its impact on paint safety is dramatic.
Bucket one contains your diluted pH-neutral car wash shampoo. Bucket two contains clean water only. Each is fitted with a grit guard — a plastic grid that sits at the bottom of the bucket and traps contamination below the waterline.
The process: dip your wash mitt into the soapy water, wash one panel of the car in straight overlapping strokes, then plunge the mitt into the rinse bucket before reloading with soapy water. The grit guard prevents any debris you rinse from the mitt from cycling back up and returning to the soapy water. The result is a wash that reintroduces virtually no grit to the paint surface — the direct opposite of what a communal foam brush or single-bucket wash achieves.
This system is the single most important technique upgrade in the car wash self wash skill set.
Foam Cannon or Foam Gun
A foam cannon (pressure washer attachment) or foam gun (garden hose attachment) allows you to apply a thick blanket of pre-wash snow foam across the entire vehicle before making any physical contact with the paint. This contact-free first cleaning stage chemically breaks down road grime, traffic film, and organic contamination, reducing the amount of abrasive material present on the surface when your wash mitt arrives.
Every serious home car wash self wash practitioner uses some form of foam application. It is the step that most directly reduces wash-induced scratching on heavily contaminated vehicles.
Essential Products to Stock
A well-provisioned home car wash self wash station carries the following:
pH-neutral car wash shampoo — The foundation of every safe wash. Never use dish soap or household detergent, both of which strip wax and sealant from the paint and degrade rubber seals over time.
Pre-wash snow foam — For the foam cannon or foam gun pre-wash stage. Choose a product formulated for your level of vehicle contamination — heavier options for vehicles washed infrequently, lighter formulas for regular maintenance washes.
Dedicated wheel cleaner — A pH-safe alloy wheel cleaner dissolves brake dust and iron particles from the wheel finish far more effectively than general-purpose shampoo.
Clay bar and lubricant — Used every three to six months to remove bonded surface contamination that washing cannot address. An essential periodic step in any serious car wash self wash routine.
Microfiber wash mitts — At least two: one for the vehicle body, one for lower panels and wheel arches. Wash and dry mitts after every use and replace when they begin to show wear.
Plush microfiber drying towels — Large, high-GSM drying towels prevent water spots and scratch risk during the drying stage. Do not use chamois leathers or bath towels on painted surfaces.
Paint protection product — Spray wax, liquid wax, synthetic sealant, or ceramic coating spray depending on your preference and budget. Applying protection after every wash is what makes the results last.
Interior cleaning essentials — All-purpose cleaner, upholstery cleaner, leather cleaner and conditioner, automotive glass cleaner, and UV-protective interior dressing.
The Complete Car Wash Self Wash Process: Step by Step
This is the complete process used by professional detailers and experienced home enthusiasts to achieve genuinely outstanding results from every car wash self wash session. Follow these steps in sequence every time.
Step 1 — Preparation
Park in a shaded area or wash during early morning or late afternoon hours when direct sunlight is not hitting the paint. Heat causes shampoo to dry on the surface before rinsing, leaving residue marks and complicating the process. Remove any loose items from inside the vehicle if you plan to clean the interior as well, and lay out all your products and tools before starting the water.
Step 2 — Cold Water Pre-Rinse
Begin every car wash self wash session with a thorough cold rinse using your pressure washer or hose. Start at the roof and work methodically downward, directing the flow into wheel arches, door sill channels, front bumper, and any area where mud or debris is visibly packed. The goal is to remove all loose surface contamination before any product contact, so nothing abrasive is present on the paint surface when your wash mitt arrives.
Spend at least 60 to 90 seconds on this pre-rinse. Time invested here directly reduces the scratch risk in every subsequent step.
Step 3 — Wheels and Tires
Wheels always come first in a proper car wash self wash sequence. They carry the heaviest contamination — brake dust, iron particles, road tar, and packed grime — and cleaning them after the body would result in contaminated water splashing onto freshly washed panels.
Apply wheel cleaner to each wheel’s face, spoke areas, and inner barrel. Allow a 30 to 60 second dwell time for the product to break down brake dust and iron deposits. Agitate with dedicated wheel brushes — a long barrel brush for the inside of the rim, a spoke brush for the face, a smaller detail brush for lug nut areas. Rinse thoroughly with high pressure.
Apply tire cleaner to the rubber sidewalls and scrub with a stiff bristle tire brush before rinsing completely.
Step 4 — Snow Foam Pre-Wash
Using your foam cannon or foam gun, coat the entire vehicle in a thick, even layer of pre-wash snow foam from roof to bumpers. Allow the foam to dwell on the surface for five to ten minutes. During this time, the product works chemically to loosen traffic film, road pollution, and organic contamination from the paint surface without any physical contact.
Rinse the foam completely with your pressure washer or hose. The paint will already be significantly cleaner, and the abrasion risk during the hand wash step is dramatically reduced. This is one of the most impactful steps in any serious car wash self wash routine.
Step 5 — Two-Bucket Hand Wash
With your two buckets prepared — one soapy, one clean, both fitted with grit guards — begin hand washing the vehicle from the roof downward using your clean microfiber wash mitt.
Load the mitt from the soapy bucket. Wash one full panel using straight, overlapping horizontal strokes. Never scrub in circles — circular motion creates circular swirl marks that are highly visible in sunlight. After each panel, plunge the mitt into the rinse bucket and agitate it against the grit guard before reloading from the soapy bucket.
Work through the vehicle in a logical sequence: roof, windscreen, rear glass, bonnet, boot lid, door tops, door centres, lower doors, front bumper, rear bumper. The lowest and dirtiest panels come last to prevent heavy contamination from being carried up to cleaner areas.
If your rinse bucket becomes visibly contaminated with debris mid-wash, replace the water before continuing.
Step 6 — Full Rinse
Switch back to your pressure washer or hose and rinse the entire vehicle from top to bottom. Flush all shampoo from every gap, seam, badge edge, mirror surround, door handle recess, grille channel, and trim edge. Any soap residue left to dry will leave dull, hazy marks on the finish.
Step 7 — Clay Bar Treatment (Every 3–6 Months)
After a thorough wash and rinse, certain contamination remains bonded to the paint surface and cannot be removed by shampoo alone. Industrial fallout, rail dust, tree sap residue, and micro-particles of road tar all bond to clear coat at a level that requires mechanical removal.
Run the back of your clean hand gently across a washed panel. If the surface feels anything other than completely smooth — if there is any detectable roughness or texture — contamination is present and clay bar treatment is needed.
Spray a section of paint generously with clay bar lubricant. Glide the clay bar across the surface using minimal downward pressure. On the first pass, you will feel and sometimes hear the clay picking up contamination — a slight dragging sensation that diminishes as the surface clears. Fold the clay bar to expose a clean surface regularly and work section by section across the full vehicle.
This step transforms the paint texture and is essential before any wax or sealant application in your car wash self wash routine.
Step 8 — Dry Immediately
Never allow the vehicle to air-dry after rinsing. Minerals in tap water leave spots on paint and glass that can be stubborn to remove once dried. Use large, plush microfiber drying towels to dry the vehicle immediately after the final rinse, working panel by panel from the roof downward.
Apply a quick detailer spray to each panel before running the towel across it — this acts as a lubricant under the towel for a streak-free finish and adds a light protective layer simultaneously.
Use a separate, smaller drying cloth for door jambs, fuel filler areas, and boot sills to avoid transferring contamination from those areas onto your main paint drying towels.
Step 9 — Paint Protection
Every thorough car wash self wash session should conclude with a protective product applied to the clean, dry paint. Without protection, fresh paint is exposed and vulnerable — UV rays degrade the clear coat, water spots form more readily, and contamination bonds to the surface faster than it would on a protected finish.
Spray wax: The fastest option. Spray on, wipe off during the drying stage. Adds a light layer of wax protection and enhances gloss. Ideal for regular maintenance washes.
Paste or liquid carnauba wax: Deeper protection with a warm, rich glow. Lasts four to eight weeks. Apply with a foam applicator pad, allow to haze lightly, then buff off with a clean microfiber cloth.
Synthetic polymer sealant: More durable than wax, lasting four to six months. Slightly more technical finish than carnauba but excellent protection for a daily driver.
Ceramic coating spray: The modern premium option. A single application provides six to twelve months of hydrophobic, UV-resistant protection. The best long-term choice for any committed car wash self wash practitioner who wants maximum protection between sessions.
Step 10 — Interior Cleaning and Finishing Touches
A complete car wash self wash always includes the interior. Remove floor mats and vacuum the entire cabin thoroughly — seats, carpets, door pockets, center console, and boot. Wipe all hard surfaces with diluted all-purpose cleaner applied to a microfiber cloth. Clean interior glass with automotive glass cleaner and a dedicated glass cloth, wiping in one direction then cross-wiping to eliminate streaks.
Treat fabric seats with upholstery cleaner and a soft brush. Apply leather cleaner followed by a quality conditioner to leather upholstery. Apply UV-protective interior dressing to all plastic and vinyl surfaces.
Apply tire dressing to the sidewalls with a foam applicator. Wipe all door jambs and shut faces with a damp APC cloth. Restore any faded exterior trim with a dedicated trim restorer.
Step back and do a full walk-around inspection to identify anything missed. These final details are what separate a thorough car wash self wash result from an average one.
How Often Should You Do a Car Wash Self Wash?
Establishing a consistent schedule keeps results looking their best with minimum effort and prevents contamination from building up to the point where it requires aggressive correction to address.
Every 2 to 3 weeks: Maintenance wash using the two-bucket method with snow foam pre-wash. Apply spray wax during drying. This frequency keeps surface contamination low and maintains active paint protection at all times.
Every 3 months: Full decontamination wash including clay bar treatment followed by a fresh coat of wax or polymer sealant. This is the most important scheduled session in the car wash self wash calendar.
Every 3 to 6 months: Full interior deep clean in addition to the exterior routine.
Once or twice annually: Paint condition assessment and correction as needed, followed by a premium protection application.
Vehicles parked outdoors, driven near the coast, used in dusty or industrial environments, or subjected to frequent bird dropping exposure will benefit from the shorter end of each interval.
Common Car Wash Self Wash Mistakes to Eliminate
Even experienced home washers carry habits that reduce their results or silently damage their paint over time. Eliminating these errors from your car wash self wash routine makes an immediate and visible difference.
Washing in direct sunlight or on warm paint: Heat causes shampoo to dry before you can rinse it, leaving residue and complicating every subsequent step. Always wash in shade.
Using dish soap or household detergents: These products strip protective coatings, dry out rubber seals, and degrade plastic trim over time. Use only pH-neutral automotive shampoo.
Single-bucket washing: Without a dedicated rinse bucket, grit accumulates in your soapy water and returns to your wash mitt with every reload. The two-bucket method is non-negotiable.
Circular scrubbing motions: Creates swirl marks that are visually obvious in bright light. Straight strokes only, always.
Skipping paint protection: A wash without a final protective product leaves paint exposed. Even a 60-second spray wax application provides meaningful defence between full detail sessions.
Using the same cloths for multiple tasks: Designate separate microfiber cloths for paint drying, glass cleaning, interior surfaces, and wheel cleaning. Cross-contamination between these areas causes scratches, streaks, and residue.
Letting the car air-dry: Mineral-laden tap water leaves water spots. Dry immediately after every rinse, every time.
Final Thoughts
The car wash self wash approach — whether at a well-chosen self-serve bay or in your own driveway with a full home setup — represents the best possible way to maintain your vehicle’s appearance and protect the investment your car represents. It is safer for your paint than any automated machine, more affordable than any professional service, and produces results that genuinely reflect the care and attention you put into the process.
Start with the two-bucket system, a quality wash mitt, and a proper pH-neutral shampoo. Add a foam cannon and clay bar as your confidence and kit grow. Apply protection every single wash without exception. Do those things consistently and the results will speak for themselves — a car that turns heads not because it is new, but because it is immaculately maintained.