Introduction
Looking for a reliable home made car soap that cleans well without stripping your wax or scratching the clear coat? This guide covers six tested recipes, the right ingredient ratios, a full step-by-step washing method, common mistakes to avoid, and everything in between. Whether you wash once a week or once a month, you will find a formula here that fits your car, budget, and cleaning routine.
Quick Answer A good home made car soap uses castile soap or dish soap as the base, mixed with water and optional conditioners like glycerin. The basic formula is 1 tablespoon of dish soap per 1 gallon of warm water. Apply with a microfiber wash mitt using the two-bucket method. Rinse panel by panel. Avoid bleach-based cleaners, harsh degreasers, and direct sunlight while washing.
What Is Home Made Car Soap?
Home made car soap is a cleaning solution you mix at home using household or store-bought ingredients. It removes road grime, dust, bird droppings, tree sap, and light grease from automotive paint surfaces.
It replicates the surfactant action of commercial products using dish soap, castile soap, or baby shampoo as the primary cleaning agent. The main goal is to lift dirt off the paint without stripping protective wax or sealant layers.
Most drivers switch to DIY formulas to save money. A single batch costs between $0.10 and $0.50, compared to $1.00 to $3.00 per wash with commercial products.
What Ingredients Do You Need for Home Made Car Soap?
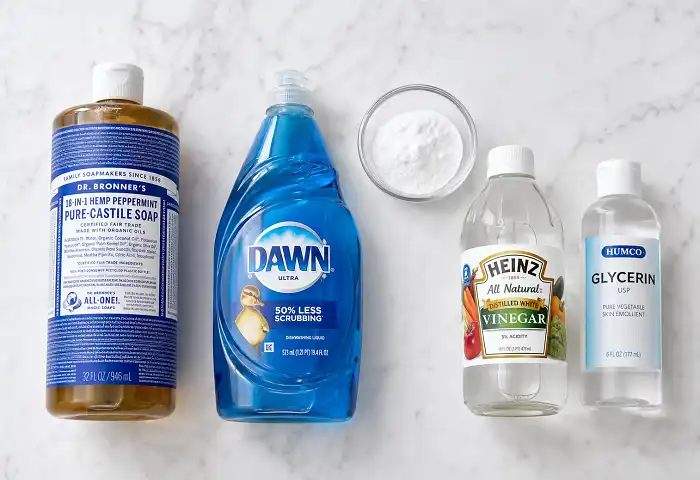
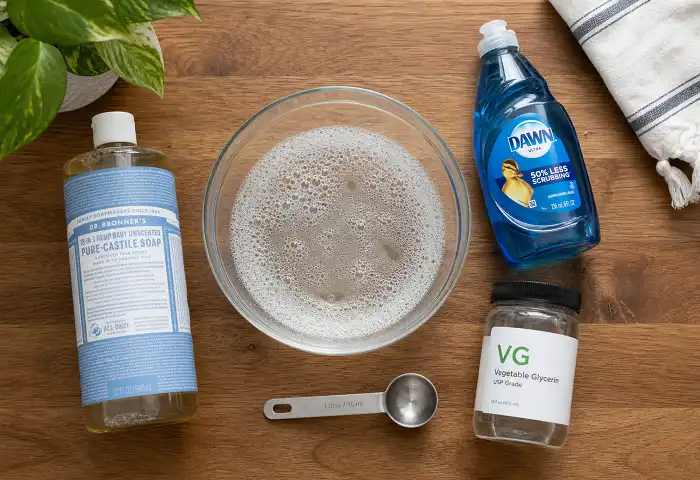
Choosing the right ingredients separates a safe formula from one that damages paint over time. Here are the most effective options:
Dish soap (such as Dawn Original) Dish soap cuts through grease and light road tar. Frequent use strips wax coatings, so limit it to twice per month on waxed surfaces.
Castile soap Castile soap is plant-based and gentle on clear coat finishes. It cleans effectively without leaving residue. Dr. Bronner’s Pure-Castile Liquid Soap is a widely used option among DIY car washers.
Baby shampoo Baby shampoo produces a low-pH lather gentle on new paint and ceramic-coated finishes. It rinses cleanly and does not leave a film.
Glycerin Glycerin adds lubrication to the wash solution. This reduces friction between the wash mitt and the paint surface, decreasing the chance of micro-scratches during scrubbing.
Baking soda Baking soda acts as a mild abrasive and deodorizer. Add 1 teaspoon per gallon for extra cleaning power on heavily soiled surfaces or older finishes.
White vinegar White vinegar removes water spots and mineral deposits. Use it in a 1:10 ratio with water as a post-wash rinse. Do not mix it into the main wash solution, as it can dull wax finishes.
For a deeper look at ingredient combinations, check out this guide on proven DIY car soap recipes that covers additional formula variations.
How Do You Make Home Made Car Soap? (6 Recipes)
Each recipe below targets a specific need. Choose based on your car’s paint condition, coating type, and wash frequency. Here are six proven formulas you can prepare at home:
Recipe 1: Basic Dish Soap Formula
Best for: Weekly washing on unwaxed or older vehicles
Ingredients:
- 1 tablespoon dish soap (Dawn Original or equivalent)
- 1 gallon warm water
Steps:
- Fill a clean 5-gallon bucket with 1 gallon of warm water.
- Add 1 tablespoon of dish soap.
- Stir gently. Do not shake — excess foam becomes difficult to rinse.
- Use with a microfiber wash mitt.
- Rinse the car thoroughly after washing each panel.
This home made car soap formula cleans well but removes wax with repeated use. Re-wax every 4 to 6 weeks if you rely on this recipe regularly.
Recipe 2: Castile Soap Formula
Best for: Waxed paint, spray sealants, and ceramic-coated finishes
Ingredients:
- 2 tablespoons castile soap
- 1 gallon warm water
- 1 teaspoon glycerin
Steps:
- Add glycerin to the bucket first.
- Pour in 1 gallon of warm water.
- Add castile soap and stir gently until combined.
- Apply with a microfiber wash mitt.
- Rinse panel by panel using clean water.
This home made car soap sits at a pH of roughly 8 to 9, which is gentle enough to preserve wax and paint sealants. It produces moderate foam and rinses without leaving residue.
Recipe 3: Baby Shampoo Formula
Best for: New factory paint finishes, freshly waxed surfaces, and light cleaning
Ingredients:
- 2 tablespoons baby shampoo
- 1 gallon warm water
Steps:
- Mix baby shampoo into warm water.
- Stir gently until a light lather forms.
- Apply with a soft microfiber wash mitt.
- Rinse each panel immediately after washing.
This home made car soap produces low foam, which simplifies rinsing. Its gentle pH makes it suitable for modern clear coats and hydrophobic surface treatments.
Recipe 4: Deep-Clean Baking Soda Formula
Best for: Heavy grime, bug splatter, bird droppings, and older paint finishes
Ingredients:
- 1 tablespoon dish soap
- 1 teaspoon baking soda
- 1 gallon warm water
Steps:
- Dissolve baking soda in warm water first.
- Add dish soap and stir gently.
- Apply and let it dwell on heavy soiling for 30 seconds before scrubbing.
- Rinse immediately after each panel.
This home made car soap delivers extra cleaning power through mild abrasion. Avoid using it on freshly polished clear coat or recent paint correction work.
Recipe 5: White Vinegar Mineral Spot Treatment
Best for: Hard water spots and mineral buildup on glass and paint
Ingredients:
- 1 cup white vinegar
- 10 cups water
Steps:
- Mix vinegar and water in a spray bottle or separate bucket.
- Apply after the main wash step, while the car is still wet.
- Let it dwell on affected panels for 60 seconds.
- Rinse thoroughly with clean water before drying.
This home made car soap variation functions as a finishing rinse, not a primary wash. Use it after completing your regular cleaning step. For more mineral buildup techniques, see this homemade car shampoo guide.
Recipe 6: Glycerin Conditioning Formula
Best for: Dry climates, UV-exposed paint, matte finishes, and vinyl wraps
Ingredients:
- 2 tablespoons castile soap
- 1 tablespoon glycerin
- 1 gallon warm water
- 5 drops of lemon essential oil (optional, for scent only)
Steps:
- Add glycerin and castile soap to warm water.
- Stir until fully combined.
- Add essential oil if desired.
- Apply with a microfiber wash mitt using light, straight strokes.
Glycerin reduces drag during washing and conditions the surface. This home made car soap formula performs well on matte paint and vinyl wraps that require low-friction cleaning solutions.
How Do You Apply Home Made Car Soap the Right Way?

Application technique affects results as much as the formula. Follow these steps every time you wash:
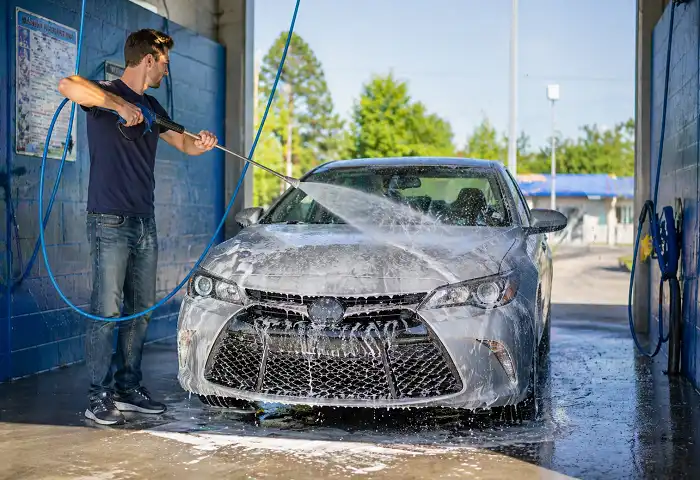
Step 1: Pre-rinse the car Use a garden hose or pressure washer to remove loose dirt before contact washing. This prevents abrasive particles from scratching paint when the mitt makes first contact.
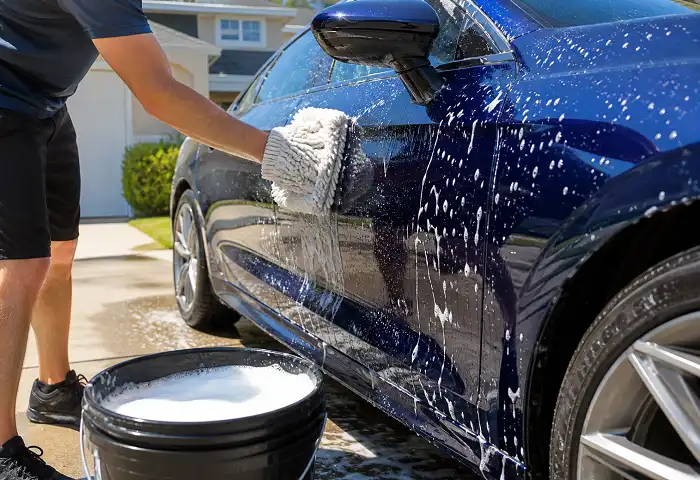
Step 2: Set up two buckets Fill one bucket with your wash solution. Fill a second bucket with clean rinse water. This two-bucket method keeps contaminated water out of the wash solution between panels.
Step 3: Wash top-down Start at the roof, then move to the windows, hood, trunk, doors, and lower body panels. Top-down washing prevents grit from upper sections running onto already-cleaned areas.
Step 4: Use a microfiber wash mitt Microfiber traps dirt particles above the surface contact layer, which reduces scratching. Avoid flat cellulose sponges, which hold grit directly against paint.
Step 5: Rinse each panel before moving on Do not let home made car soap dry on the paint. Soap residue bakes into the surface in direct sunlight and leaves water spots or a hazy film.
Step 6: Dry with a microfiber towel Use a 70/30 blend waffle-weave towel and pat-dry rather than drag-dry. Dragging pulls micro-particles across the surface and creates swirl marks.
For a full walkthrough of the hand wash process, this hand wash car guide covers preparation, tools, and post-wash protection steps.
Is Home Made Car Soap Safe for Wax and Ceramic Coatings?
Home made car soap safety depends entirely on which formula you choose.
Dish soap removes carnauba wax after 3 to 4 washes and degrades spray sealants faster. Use dish soap only on unprotected or bare paint finishes.
Castile soap is safe for carnauba wax, spray sealants, and paint protection film (PPF). Its surfactant concentration is low enough to clean without chemically stripping protective layers.
Baby shampoo is safe for professional ceramic coatings and hydrophobic surface treatments. It preserves the contact angle of water-repellent coatings better than dish soap.
If your vehicle has a professional ceramic coating, use only the castile soap or baby shampoo recipe. According to the EPA’s Safer Choice program, surfactant concentration in cleaning products directly affects how quickly they degrade surface treatments.
What Mistakes Should You Avoid When Using Home Made Car Soap?
Most paint damage during DIY washing comes from poor technique, not the formula. Avoid these common errors:
Using too much soap More soap does not clean better. Excess concentrations leave a film that dries into hazy residue. Follow the measured ratios in each recipe above.
Washing in direct sunlight The home made car soap solution evaporates before you rinse it in direct sun. This leaves soap deposits and water spots on the paint. Wash in shade or on overcast days.
Using a single bucket A one-bucket wash re-deposits dirty rinse water onto the paint through the mitt. Always use two buckets: one for wash solution, one for rinsing the mitt.
Skipping the pre-rinse Scrubbing dry paint with even the gentlest home made car soap pulls loose grit across the surface and creates micro-scratches. Pre-rinse every time, without exception.
Using a rough sponge or household cloth Flat sponges and terry cloth towels hold grit against paint. Microfiber mitts and drying towels reduce friction and surface contact pressure.
Letting runoff drain into storm drains Soapy wash water contains surfactants and automotive contaminants. Washing on grass or gravel allows the soil to filter runoff naturally. The EPA’s NPDES stormwater program outlines guidance on pollutant discharge from non-industrial sources, which includes residential car washing.
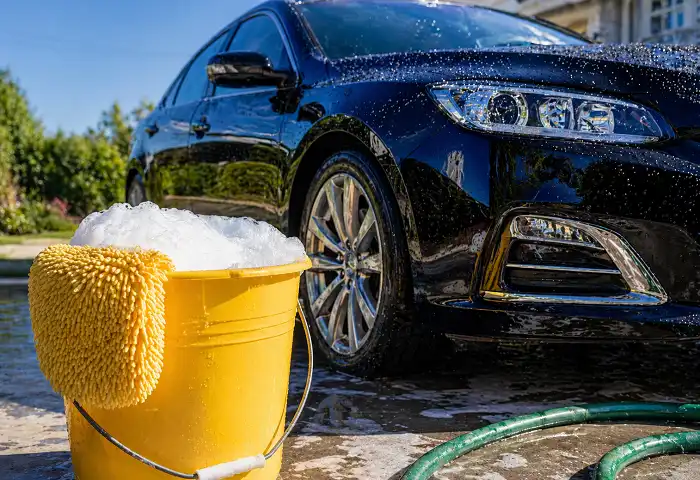
Does Home Made Car Soap Work in a Foam Cannon?
Yes, certain home made car soap recipes produce enough foam for foam cannon use. Castile soap and baby shampoo both perform well in foam cannon attachments. Dish soap also works but may over-foam in some units.
Foam cannon dilution ratio:
- 2 to 3 oz of castile soap per foam cannon chamber
- Fill the remainder with water
- Adjust based on your specific cannon model’s instructions
Avoid thick gel-based soaps in foam cannon equipment. Thin, liquid formulas flow better through the nozzle and produce more consistent foam coverage across body panels.
The foam cannon pre-wash step loosens contamination before contact washing, which reduces scratch risk during the main wash. For more DIY car soap formulas that work in cannons, those options cover different dilution approaches.
How Does Home Made Car Soap Compare to Store-Bought Products?
Home made car soap costs significantly less per wash than commercial products. Castile soap costs approximately $8 to $10 per bottle and produces 20 to 30 wash batches. Commercial car wash concentrates range from $10 to $30 per bottle with similar batch yield.
The tradeoff is formulation depth. Commercial products include foam boosters, pH buffers, carnauba wax conditioners, and rinse aids that home formulas lack. For routine maintenance washing, a home-mixed formula performs comparably. For pre-detailing prep or decontamination washes before ceramic coating application, a dedicated commercial strip wash delivers more precise results.
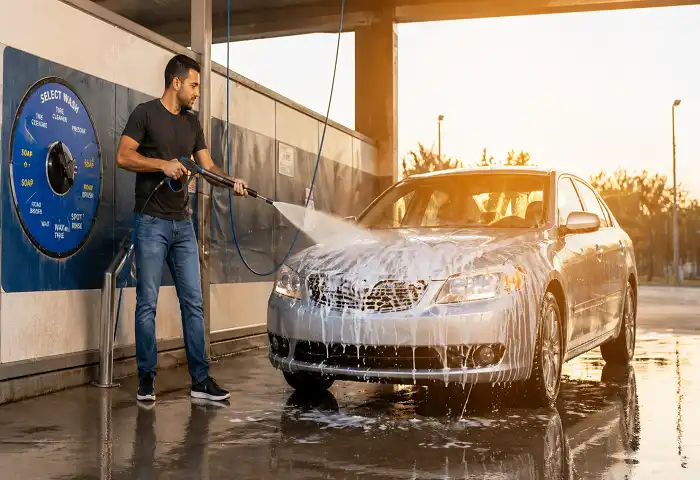
When comparing against professional facilities, a self-serve car wash typically uses commercial-grade high-foam soaps under pressure, which removes heavier contamination faster than hand-applied home formulas.
How Frequently Should You Wash Your Car?
Washing frequency depends on your environment and driving conditions.
| Condition | Recommended Frequency |
|---|---|
| Daily driver in an urban area | Every 1 to 2 weeks |
| Light use in a clean environment | Once a month |
| Coastal location with salt air | Every 7 to 10 days |
| After rain, mud, or off-road use | As needed |
Using a dish soap-based formula more than twice per month strips wax protection faster. Alternate with the castile or baby shampoo recipe to extend wax life between professional detailing sessions.
Vehicles with bird dropping exposure, industrial fallout, or tree sap contact need more frequent washing regardless of formula type. Acidic contaminants begin breaking down clear coat quickly, so removing them during your next scheduled wash reduces the risk of permanent paint damage.
What Equipment Do You Need for a DIY Car Wash?
The right tools improve any wash recipe’s results. Here is what to have on hand:
- Two 5-gallon buckets: One for wash solution, one for rinsing the mitt between panels.
- Grit guards: Sit at the bottom of each bucket and trap settled dirt, preventing re-contact with the mitt.
- Microfiber wash mitt: Traps particles above the surface contact layer during scrubbing.
- Microfiber drying towel: A 70/30 waffle-weave blend absorbs water efficiently without dragging.
- Foam cannon (optional): Attaches to a pressure washer for pre-foam coverage.
- Detailing brushes: For wheel wells, door jambs, emblems, and trim sections.
- pH-neutral spray wax (optional post-wash): Restores protection removed by dish soap formulas.
Pairing a proper microfiber mitt with the two-bucket method significantly decreases swirl mark formation compared to single-bucket sponge washing. The grit guard is a low-cost addition that reduces particle re-contact during the process. Check out car wash soap options and tools to see what works well alongside DIY formulas.
How Do You Store Your DIY Wash Solution?
Mix this solution fresh before each wash session. Pre-mixed batches degrade over time, particularly formulas containing baking soda or essential oils.
If you prefer to batch-prepare, store the solution in a sealed, opaque plastic container away from direct sunlight and heat. Label it with the formula name and preparation date. Use the batch within 14 days.
Castile soap and baby shampoo store well in their original containers at room temperature for up to 12 months after opening. These base ingredients do not require refrigeration or special storage conditions.
Troubleshooting Common Problems
Problem: Soap leaves a white film after rinsing Cause: Soap concentration is too high. Fix: Halve the soap amount in your next batch and add a final clean-water rinse pass.
Problem: Water spots remain after drying Cause: Hard water minerals in tap water. Fix: Apply the white vinegar rinse (Recipe 5) as a final step before drying.
Problem: Paint looks dull after washing Cause: Dish soap removed the wax layer. Fix: Switch to the castile soap formula and apply a spray wax after drying.
Problem: Mitt leaves light scratches Cause: Grit trapped in the mitt, or the pre-rinse step was skipped. Fix: Pre-rinse the car before washing and rinse the mitt in the second bucket after completing each panel.
Problem: Soap does not foam in a foam cannon Cause: Wrong soap type or too diluted. Fix: Switch to castile soap at 2 to 3 oz per cannon chamber.
Conclusion
Home made car soap gives you a low-cost, flexible alternative to commercial car wash products. The right formula depends on your paint type, protective coating, and wash frequency. Use castile soap or baby shampoo on wax or ceramic-coated finishes. Use dish soap for quick heavy-duty cleaning on bare or older paint. Use the baking soda formula for stubborn grime and the vinegar rinse for hard water spots.
Pair any recipe with the two-bucket method, a microfiber wash mitt, a top-down wash sequence, and a thorough rinse. Technique matters as much as the formula. Get both right, and your paint stays cleaner between professional detailing sessions.