Introduction: Why a Car Wash You Do Yourself Is Worth Every Minute
There is something deeply satisfying about stepping back and looking at your freshly cleaned car gleaming in the driveway. No drive-through tunnel, no waiting line, no stranger rushing through the job — just you, the right tools, and a little patience. A car wash you do yourself is not only rewarding, it is one of the smartest habits any car owner can build.
Professional car washes cost anywhere between $10 and $50 per visit, and if you are washing your car weekly or biweekly, those costs add up fast. Deciding to do a car wash you do yourself brings that cost down to a fraction while giving you complete control over the quality of the clean. You decide which products touch your paint. You decide how much attention each panel gets. You decide whether the job is truly done right.
But beyond saving money, there is another powerful reason millions of car owners prefer the car wash you do yourself approach: it genuinely protects the vehicle. Automatic tunnel car washes with their spinning brushes can leave micro-scratches and swirl marks on your paintwork over time. A careful, hands-on DIY wash done with quality products and proper technique is better for your car’s long-term finish than any machine.
Choosing to do a car wash you do yourself at home also gives you the freedom to work at your own pace, pay close attention to problem areas, and use premium detailing products that no commercial service would ever apply at their price point.
This complete guide walks you through everything — from gathering the right supplies and mastering the two-bucket method, to finishing with a protective wax that shields your paint for weeks. Whether you are cleaning your car for the first time at home or looking to seriously level up your technique, this guide has everything you need.
What You Need Before You Start: Car Wash Supplies Checklist
Before you attempt a car wash you do yourself, having the right supplies in place makes all the difference between a result you are proud of and one that leaves behind streaks, scratches, or missed spots. Using household dish soap or random cotton rags can damage your paint. Invest in proper car-care products once, and they will last you through dozens of washes.
Here is your complete checklist:
Cleaning Agents
- pH-balanced car wash soap — Never use dish soap. It strips the protective wax from your paint. A dedicated car shampoo lifts dirt gently without harming the clear coat.
- Wheel cleaner — Wheels accumulate brake dust and road grime that regular soap cannot handle. A dedicated wheel cleaner dissolves this build-up safely.
- Automotive glass cleaner — For perfectly streak-free windows inside and out.
- Tire shine — Optional, but it gives tires that deep, rich finish that completes the look.
Washing Tools
- Two buckets — One for soapy water, one for rinsing your wash mitt. This is the single most important tool in the kit.
- Grit guards — Place one in the bottom of each bucket. They trap dirt at the bottom so your mitt does not pick it up again.
- Microfiber wash mitt — Soft, thick, and very gentle on paint.
- Wheel brushes — Soft-bristle brushes in different sizes to reach lug nut pockets and barrel areas.
- Detailing brushes — For crevices, door jambs, badges, and trim.
Drying and Finishing Tools
- Large microfiber drying towel — Absorbs water quickly and leaves no lint or scratches.
- Waffle-weave drying towel — A great alternative that handles high-volume drying beautifully.
- Car wax or paint sealant — Protects and enhances your paint after washing.
- Spray detailer — For a final wipe-down and added gloss.
- Trim restorer — Brings faded black plastic trim back to a rich, deep finish.
Optional but Highly Recommended
- Garden hose with adjustable nozzle — Pressure control is important for a safe rinse.
- Foam cannon — Attaches to a pressure washer and produces thick foam that pre-soaks the car, loosening dirt before you even touch it with a mitt.
- Electric pressure washer — Speeds up rinsing and does an excellent job blasting dirt from wheels and wheel wells.
Having all these tools ready before you start your car wash you do yourself session means less running back and forth, a smoother workflow, and consistently better results.
Step-by-Step: The Perfect Car Wash You Do Yourself
Now that your supplies are organised and ready, it is time to get to work. Follow these steps in exact order for the best results every time you do a car wash you do yourself at home.
Step 1: Choose the Right Time and Place
Never begin a car wash you do yourself in direct sunlight or when the car’s body panels are hot to the touch. When the surface is warm, soap and water dry almost instantly, leaving behind residue and water spots that are frustrating to remove after the fact.
Choose a shaded spot on your driveway or garage apron. Early morning and early evening are the ideal times — temperatures are cooler, the light is softer, and you are not fighting rapid evaporation. Park on a flat surface so dirty water drains away from the car naturally rather than pooling underneath it.
Step 2: Rinse the Car Thoroughly First
Before applying any soap during your car wash you do yourself, give the entire car a thorough pre-rinse from top to bottom using your garden hose or pressure washer.
This pre-rinse is more critical than it might seem. It removes loose dirt, dust, dried bird droppings, pollen, and light debris that would otherwise act like fine sandpaper against your clear coat the moment your wash mitt makes contact.
Pay extra attention to:
- Wheel arches and wheel wells, packed with road dirt and mud
- Lower door panels and rocker panels
- The front bumper and grille where bugs and tar collect heavily
If you own a foam cannon and pressure washer, apply a thick foam coat at this stage and let it dwell for two to three minutes. The foam loosens and lubricates grime before you ever touch the car, making the contact wash far safer.
Step 3: Set Up Your Two Buckets
This is the most critical technique in a proper car wash you do yourself, and it is the step that separates a scratch-safe wash from one that inadvertently damages the paintwork.
- Bucket 1 — Wash Bucket: Fill with clean water and add your car wash shampoo as directed, typically two to three ounces per gallon.
- Bucket 2 — Rinse Bucket: Fill with clean water only. No soap.
Drop a grit guard into the bottom of each bucket. After washing each panel, rinse your mitt in the rinse bucket first, agitate it firmly against the grit guard so trapped dirt sinks to the bottom, then re-load the mitt with fresh soapy water from the wash bucket. You are never dragging yesterday’s grit back onto your clean paint.
Step 4: Clean the Wheels First
Always wash your wheels before touching the body panels during a car wash you do yourself. Wheels carry the heaviest contamination on the car — brake dust, road salt, tar, and accumulated grime. Cleaning them last means dirty spray lands on panels you just finished.
Apply wheel cleaner generously to each wheel, let it dwell for one to two minutes, then agitate with your wheel brushes from the barrel outward. Use a small detailing brush around lug nut pockets and the valve stem. Rinse each wheel fully before moving to the next.
Step 5: Wash the Body Panels Section by Section
The heart of every car wash you do yourself is the contact wash. Work through the car in logical sections — roof first, then windshield and rear glass, then hood, trunk lid, each door panel, then lower bumpers and sills. Always move top to bottom.
Use straight, overlapping, back-and-forth strokes with your loaded wash mitt. Avoid circular motions entirely — they cause the swirl marks that show up clearly in sunlight. After every panel, rinse the mitt in the rinse bucket, agitate it on the grit guard, then re-load with fresh shampoo water.
Pay special attention to:
- Door jambs — open every door and clean the inner frame thoroughly
- Behind the fuel filler flap
- Under the trunk lip and tail lights
- The lower rear bumper and exhaust surround area
Step 6: Do a Full Final Rinse
After every panel has been washed in your car wash you do yourself, perform a complete final rinse from top to bottom to remove all traces of soap.
For the best results, try the sheeting technique. Remove the spray nozzle from your hose and allow water to flow as a wide, gentle sheet across each panel. The water sheets off the surface rather than beading up, dramatically reducing the number of droplets left behind and giving you far fewer potential water spots during drying.
Step 7: Dry the Car Immediately
Never allow the car to air-dry after a car wash you do yourself. Tap water contains dissolved minerals, and when it evaporates naturally it leaves those minerals behind as white spots that are particularly visible on dark paint and glass.
Use your large microfiber or waffle-weave drying towel starting from the roof and working down. Lay the towel flat on each panel and draw it toward you rather than dragging it in tight strokes. Open every door and dry the jambs too — water trapped in those channels drips out for minutes after you think the job is done.
A few sprays of detailer on each panel before the drying towel touches it lubricates the surface, prevents micro-marring, and adds a beautiful burst of gloss at the same time.
Step 8: Clean All the Glass
Every car wash you do yourself should include dedicated glass cleaning inside and out. Use an automotive glass cleaner and a fresh, dry microfiber towel. Work in an S-pattern across the glass to avoid spreading dirt and to prevent streaks.
Do not forget the interior glass. Cabin air deposits an oily film on the inside of the windshield over time that seriously reduces forward visibility in direct sunlight. If you have stubborn water spots or bonded contamination on exterior glass, a clay bar or dedicated glass polish will remove them cleanly without scratching. Never use ammonia-based cleaners on tinted windows.
Step 9: Apply Wax or Paint Sealant
This finishing step is what takes a standard car wash you do yourself to a professional level of results. Wax or sealant applied to clean paint creates a sacrificial protective layer that blocks UV rays, repels rain and pollution, and makes every future wash easier.
Choose your protection:
Carnauba wax — Produces a warm, deep, rich gloss. Lasts four to six weeks. Best for weekend and show cars.
Synthetic paint sealant — Slightly less depth of gloss but much longer-lasting — typically three to six months. Perfect for daily drivers.
Ceramic spray coating — The latest technology, bonds to the clear coat and offers protection for up to six to twelve months per application.
Apply wax with a foam applicator pad, one panel at a time, in small overlapping circles. Allow it to haze (two to five minutes), then buff off with clean microfiber using straight strokes.
Step 10: Restore the Trim and Dress the Tires
The final step of your car wash you do yourself is the one that gives everything a polished, professional finish. Black plastic trim on bumpers, mirror housings, and door handles fades to a dull grey from UV exposure. A quality trim restorer applied with a microfiber applicator restores it to a deep, uniform black and protects it going forward.
Apply tire dressing to the sidewalls using an applicator sponge, working evenly from bead to outer edge. Use a water-based, non-sling formula to prevent splatter on your freshly cleaned fenders when you drive away.
Step back and take in the result. A well-executed car wash you do yourself looks like this — spotless, gleaming, and protected.
Pro Tips to Make Every Car Wash You Do Yourself Better
The following refinements help you avoid the most common mistakes and produce consistently excellent results each time you do a car wash you do yourself at home.
Pay Attention to Water Quality
Very hard tap water — water with a high mineral content — leaves stubborn spots even when you dry quickly. An inline hose water filter softens the water before it hits your car. Alternatively, use a gallon or two of deionised water for the final rinse. Deionised water contains zero dissolved minerals and leaves absolutely no spots.
Always Work on a Cool Surface
Heat is the enemy in every car wash you do yourself. If the car has been sitting in direct sunlight, allow at least twenty minutes in the shade before you begin. Hot panels cause soap to flash-dry in seconds, leaving a film that requires extra effort to buff away cleanly.
Never Reuse a Dropped Wash Mitt
If your wash mitt hits the ground, set it aside and use a fresh one. A single pass with a contaminated mitt can leave a trail of fine scratches that requires machine polishing to correct. Spare mitts are inexpensive — keep two or three in your kit.
Do a Clay Bar Treatment Every Few Months
Even on a regularly washed car, industrial fallout, rail dust, tree sap, and microscopic overspray bond to the paint over time and cannot be removed by washing alone. A detailing clay bar pulled across the surface every three months removes these embedded contaminants and leaves the paint glass-smooth. Wax adheres far better to a clayed surface.
Keep a Spray Detailer Between Washes
Between full car wash you do yourself sessions, a spray detailer is your most useful tool. A few sprays on a panel and a wipe with a clean microfiber cloth removes fingerprints, light dust, and fresh bird droppings in moments — keeping your car looking freshly washed for much longer between proper wash sessions.
Maintain Your Microfiber Towels Properly
Wash microfiber towels separately from regular laundry using a small amount of liquid detergent — no fabric softener, which clogs the fibres and destroys their ability to lift and trap contaminants. Tumble dry on low heat or air dry. Properly cared-for towels last for hundreds of washes.
How Often Should You Do a Car Wash You Do Yourself?
The right frequency for a car wash you do yourself depends on your climate, your daily driving conditions, and the time of year.
- Every two weeks — The sweet spot for most drivers in most conditions. Prevents contamination from bonding permanently to paint.
- Weekly — If you live near the ocean, in a dusty region, or during winter months when roads are heavily salted.
- After long highway drives — Front bumpers and hoods collect bugs and tar quickly at motorway speeds.
- Monthly minimum — Even a clean-looking car has invisible UV damage, bonding road film, and airborne contamination working on the surface.
Reapply wax or sealant every one to three months depending on the product you are using and how much direct sunlight your car is exposed to when parked.
Mistakes to Avoid in Every Car Wash You Do Yourself
Even experienced home washers make these errors. Recognising them ahead of time protects your paint and saves you effort.
1. Single-bucket washing — Without a dedicated rinse bucket, you are dragging dirt from one panel to the next with every reload of the mitt. The two-bucket method is not optional.
2. Circular scrubbing motions — Swirl marks form when you scrub in circles. Always use straight, linear strokes — parallel to the length or width of each panel.
3. Using the wrong soap — Dish soap and household cleaners are formulated to strip grease aggressively. They degrade your wax, dry out rubber seals, and dull the clear coat over repeated use.
4. Drying with a bath towel — Regular towels have abrasive cotton loops that easily scratch paint. Use only automotive-grade microfiber drying towels on body panels.
5. Forgetting door jambs — Water pooling in door jambs leads to rust over time. Open every door, clean the frame, and dry it completely.
6. Waxing in direct sunlight — Wax hazes almost immediately and becomes nearly impossible to buff cleanly when it dries too fast in heat or sun.
7. Cleaning wheels last — Dirty brake dust spray will contaminate the clean paint you spent time washing. Wheels always come first.
The True Cost of a Car Wash You Do Yourself vs. Professional Washes
The financial argument for a regular car wash you do yourself is simple and compelling.
Professional car wash costs:
- Basic automated tunnel wash: $10–$15
- Premium tunnel wash with tyre shine: $20–$30
- Full-service interior and exterior: $35–$55
- Professional hand detail wash: $60–$120
- Monthly unlimited tunnel subscription: $25–$45/month
DIY setup — one-time investment:
- Two buckets with grit guards: $20–$30
- Premium car wash shampoo: $15–$25
- Microfiber wash mitt: $10–$15
- Drying towel set: $20–$30
- Wheel cleaner and brushes: $20–$30
- Spray wax or paint sealant: $15–$25
- Total: approximately $100–$155
Your ongoing annual cost after setup is just shampoo and wax replenishment — roughly $35–$55 per year. If you wash professionally twice a month at $20 per session, you spend $480 a year. A car wash you do yourself pays back its setup cost within the first few months and saves you over $400 every year that follows.
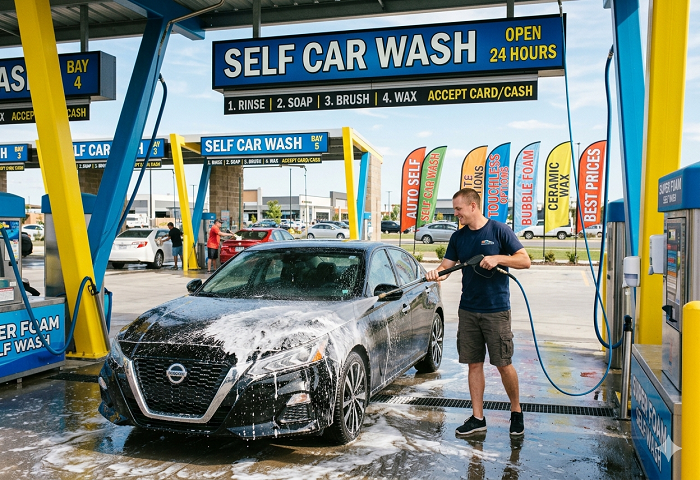
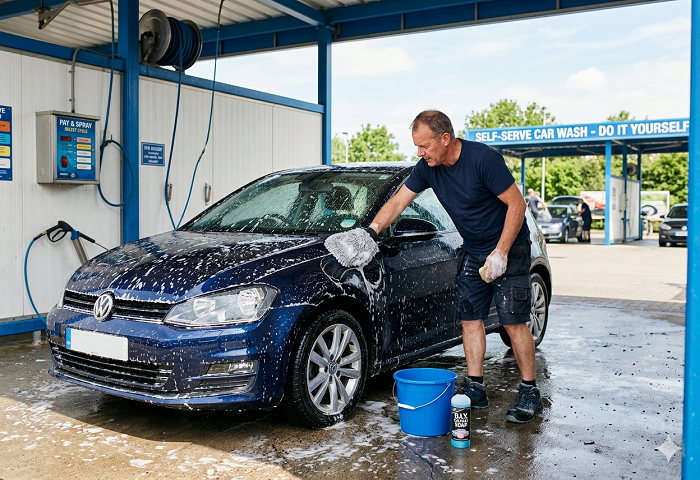
Is a Self-Service Bay the Same as a Car Wash You Do Yourself?
Many drivers wonder whether a coin-operated self-service bay counts as a real car wash you do yourself. The two share the core principle — you are doing the washing, not a machine — but they differ considerably in quality and control.
At a self-service bay, you pay for time on shared equipment: a shared pressure wand and shared brushes that have touched hundreds of other cars. The soap is chosen by the facility, time is limited, and access to trim, jambs, and detailing work is difficult.
A car wash you do yourself at home gives you your own clean tools, your chosen products, unlimited time, and the ability to properly detail every corner of the car that a self-service bay cannot accommodate.
That said, a self-service bay is genuinely useful for drivers without driveway access — apartment residents, for example — and it is significantly better for your paint than an automated tunnel. If a full home setup is not practical for you right now, a self-service bay is a reasonable way to do a car wash you do yourself without a home water supply.
Eco-Friendly Tips for the Car Wash You Do Yourself at Home
One reasonable concern about a car wash you do yourself at home involves water use and soap runoff. With a few simple adjustments, however, your home wash routine can be highly eco-conscious.
- Use a shutoff hose nozzle — Only run water when you actively need it. This habit alone can cut your water consumption in half compared to leaving the hose running.
- Choose biodegradable shampoo — Most premium car wash shampoos are formulated to break down harmlessly and are safe for garden drainage.
- Wash on grass or permeable gravel — Water is absorbed by the ground rather than channelled into storm drains with vehicle contaminants.
- Try rinseless or waterless washing — Products like Optimum No Rinse let you wash the entire car with just one to two gallons of water. Ideal for areas with water restrictions, and the results are excellent.
- Use a wash mat — These mats capture all runoff, allowing you to dispose of contaminated wash water responsibly.
With the right approach, the car wash you do yourself is one of the most environmentally considerate ways to maintain your vehicle — especially compared to commercial car washes that use between 80 and 100 gallons of water per cycle.
Final Thoughts: Make the Car Wash You Do Yourself a Regular Habit
Washing your own car is one of the most rewarding habits you can build as a vehicle owner. It protects your paint, saves you hundreds of dollars every year, and produces results that a hurried commercial wash simply cannot match.
Cars that are washed carefully and regularly at home show consistently better paint condition, less surface oxidation, and fewer rust spots over time. When it eventually comes time to sell, a well-maintained exterior tells every buyer that the whole car has been looked after — and that means a meaningfully higher asking price.
More than any of that, there is a genuine satisfaction in doing it yourself. You know every panel of that car. You know exactly what was used to clean it, how carefully it was done, and what was applied to protect it afterward. That kind of care cannot be bought at any commercial facility.
Start with the basics if you are new to this process. A quality shampoo, two buckets with grit guards, a good microfiber mitt, and a drying towel. Work through the ten steps in this guide from start to finish, and take your time. As confidence builds, add a clay bar, a foam cannon, and a ceramic spray to your kit. The results will keep improving with every session.
Your car works hard every day. It deserves the best care you can give it. And the best care it will ever receive is the wash you give it yourself — with the right tools, the right technique, and genuine attention to every detail.