Introduction
Your car deserves a great clean — and you don’t need to drive to a pricey car wash to get it. A home made car wash done right can deliver results that rival any professional service, for a fraction of the cost.
In this guide, you’ll learn everything you need to know about washing your car at home — from the best DIY soap recipes to step-by-step washing techniques, essential tools, and expert tips to protect your paint. Whether you’re a first-timer or a seasoned DIYer, this complete home made car wash walkthrough has you covered.
Why Choose a Home Made Car Wash?
There’s a reason millions of car owners are ditching the drive-through and going DIY. A home made car wash puts you in complete control — of the products, the process, and the results.
Here’s why it makes sense:
- Saves money — Professional washes can cost $15–$50+ per visit. DIY costs a fraction of that.
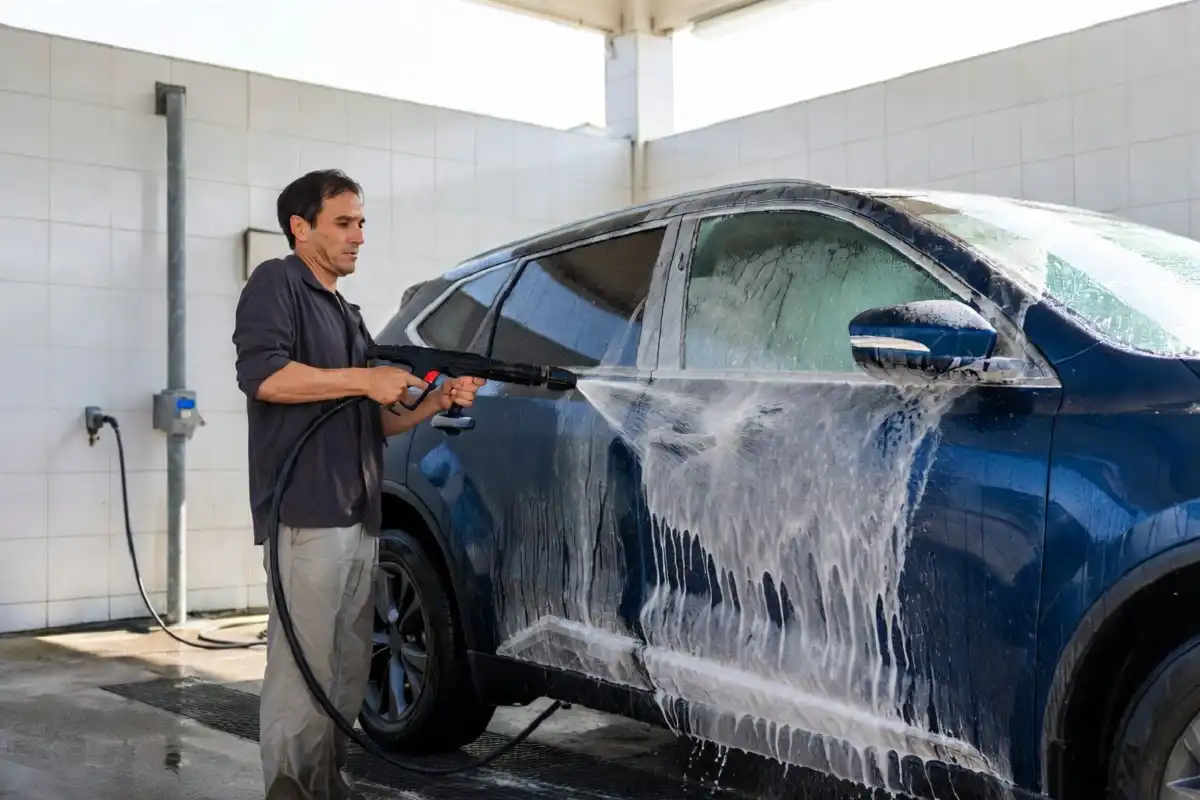
- Gentler on paint — Automated brushes can cause micro-scratches. Hand washing at home is far safer.
- Use what you trust — You choose every product that touches your car.
- Convenient — No waiting in line or driving across town.
- Eco-friendly options — You can control water usage and choose biodegradable soaps.
According to Wikipedia’s guide on car washing, hand washing remains one of the safest methods for maintaining a vehicle’s exterior finish over time.
What You Need for a Home Made Car Wash
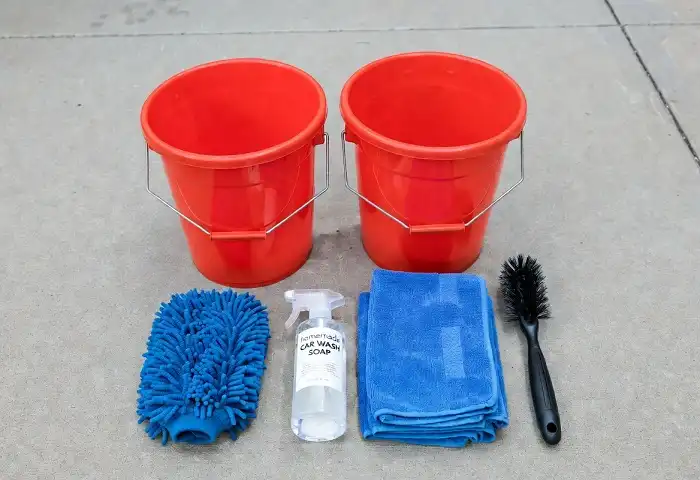
Before you start, gather the right supplies. Using the wrong tools can scratch your paint or leave streaks behind.
Essential Tools
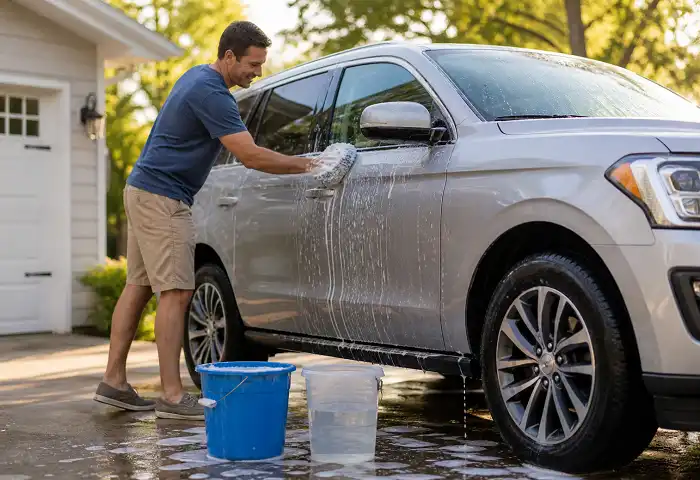
- Two buckets — one for soapy water, one for rinsing your mitt
- Microfiber wash mitt — gentler than sponges, less likely to trap grit
- Microfiber drying towels — at least 2–3 large ones
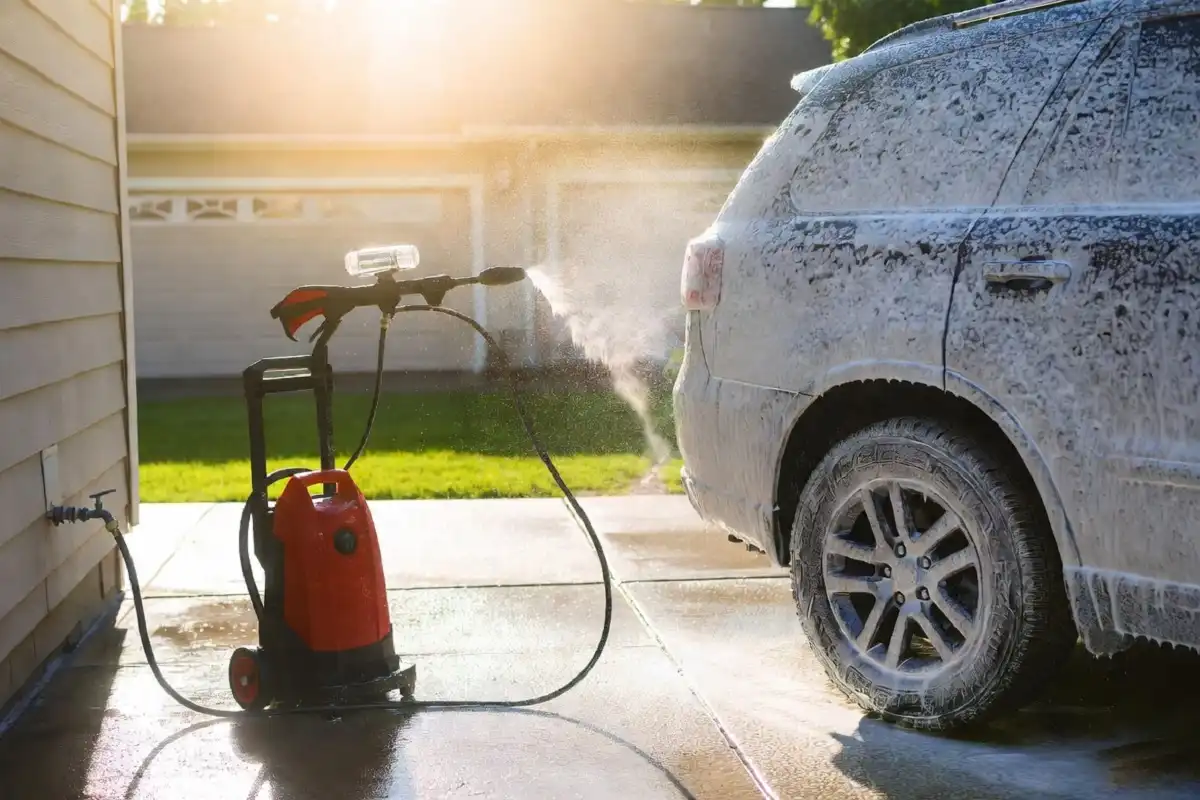
- Garden hose with adjustable nozzle — or a pressure washer on low setting
- Wheel brush — for getting into brake dust and grime
- Soft bristle detailing brush — for tight areas like emblems and grilles
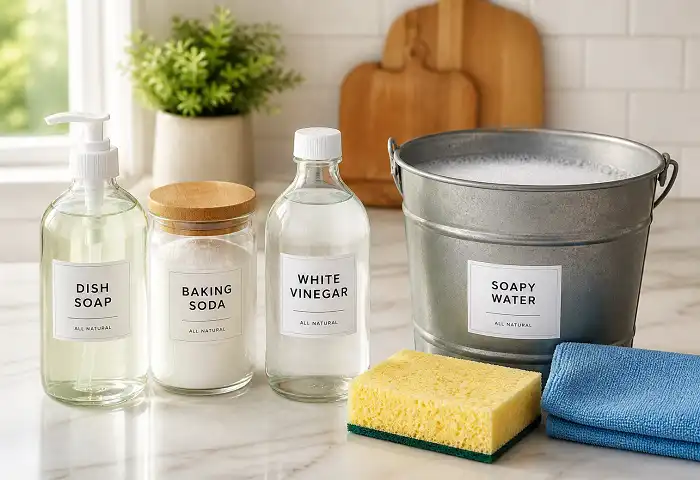
DIY Car Wash Soap Options
You don’t need to buy expensive branded products. You can make your own home made car wash soap using simple household ingredients. For ready-to-use formulas, check out our guide on home made car soap — 5 safe DIY formulas that won’t strip your wax or damage your clear coat.
If you want something stronger for road grime and bird dropping removal, explore our home made car wash cleaner — 6 safe DIY formulas for targeted cleaning solutions.
Step-by-Step: How to Do a Home Made Car Wash
Follow these steps in order. Skipping steps — especially the pre-rinse — is how most DIY car washes go wrong.
Step 1: Choose the Right Time and Place
Never wash your car in direct sunlight. The heat causes soap and water to dry too fast, leaving water spots and streaks. Choose a shaded spot or wash in the morning or evening.
Avoid washing on windy days — airborne dust can settle on your wet car and scratch the surface during wiping.
Step 2: Rinse the Car Thoroughly First
Use your hose to rinse the entire car from top to bottom before applying any soap. This loosens and removes the bulk of loose dirt, dust, and debris.
Pay extra attention to:
- Wheel wells
- Lower door panels
- Front bumper and grille
- Under the mirrors
This pre-rinse step is crucial in a home made car wash — it dramatically reduces the risk of scratching your paint during the wash stage.
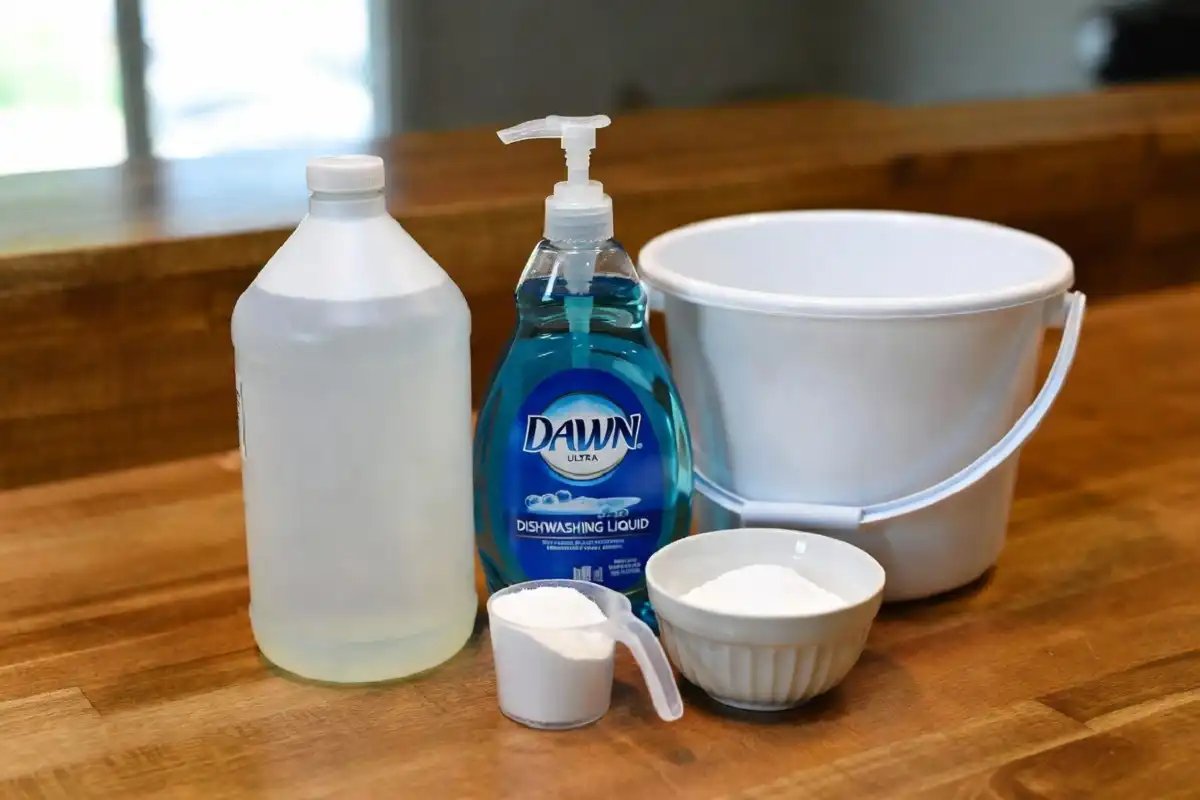
Step 3: Mix Your Home Made Car Wash Solution
Fill your wash bucket with warm water and add your chosen soap. If you’re making your own, a simple and effective recipe is:
- 1 gallon of warm water
- 2 tablespoons of dish-free, pH-neutral car soap (or DIY formula)
- Optional: 1 tablespoon of white vinegar for extra shine
For more detailed shampoo recipes, visit our article on home made car shampoo — 8 proven DIY recipes.
Fill your second bucket with plain clean water — this is your “rinse bucket” for your wash mitt between passes.
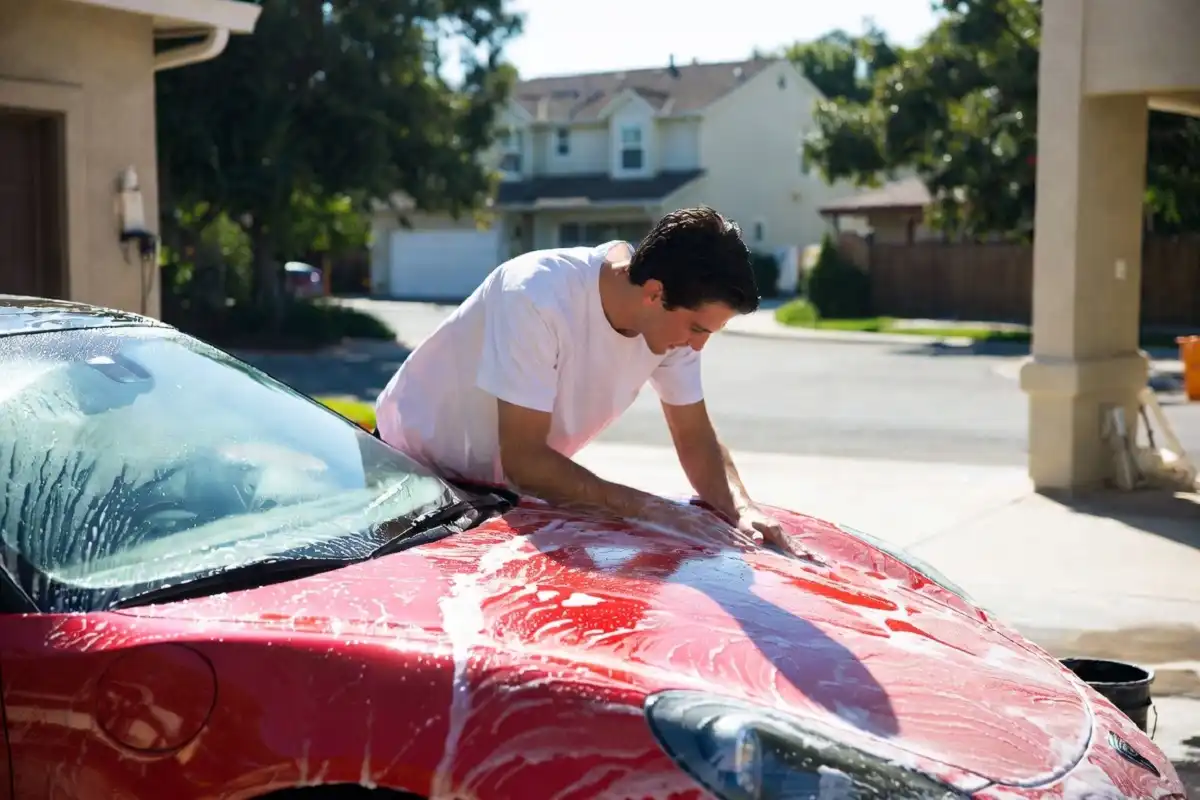
Step 4: Wash Top to Bottom
Always wash from the roof downward. The dirtiest parts of your car are at the bottom, so working top-down prevents dragging grime onto already-clean sections.
Washing order:
- Roof
- Windshield and rear window
- Hood and trunk lid
- Upper doors and quarter panels
- Lower panels and rocker panels
- Bumpers
- Wheels (always last — they’re the dirtiest)
Use gentle, straight-line strokes — not circular scrubbing motions — to minimize swirl marks.
Step 5: Rinse Your Mitt Frequently
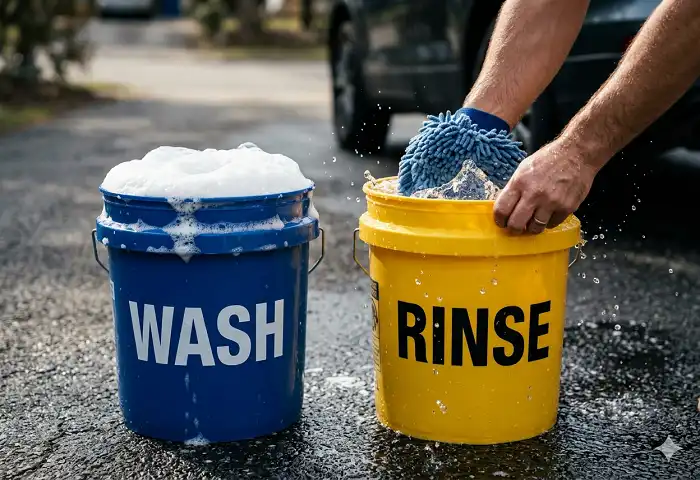
After every panel, rinse your wash mitt in the clean water bucket. Squeeze it out, then reload with soapy water. This two-bucket method is the most important habit in any quality home made car wash routine.
Skipping this step means you’re rubbing dirt and grit back onto your car — the number one cause of fine scratches.
Step 6: Final Rinse
After washing the full car, do a thorough final rinse from top to bottom. Use a steady, low-pressure flow rather than a high-pressure blast to gently sheet water off the surface — this reduces water spots.
Step 7: Dry Immediately
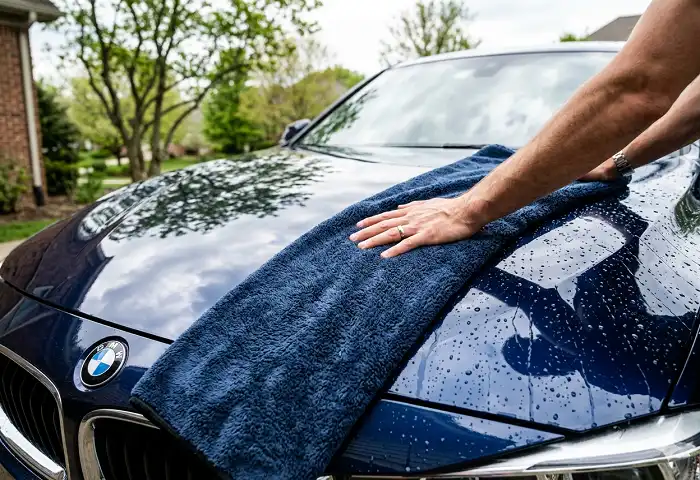
Never let your car air dry. Water spots form fast, especially if your tap water is hard (mineral-heavy).
Use clean microfiber drying towels and blot or drag gently across panels — don’t rub. Work quickly from roof to bottom. You can also use a leaf blower on a low setting to push water out of crevices and mirrors.
Step 8: Apply Wax or Sealant (Optional but Recommended)
After drying, consider applying a coat of wax to protect the clean surface. You can even make your own — our guide on car wax homemade — 7 proven recipes gives you safe, effective formulas to lock in that shine and protect your paint from the elements.
Common Home Made Car Wash Mistakes to Avoid
Even experienced DIYers make these errors. Avoid them and your results will be dramatically better.
❌ Using Dish Soap Directly
Dish soap is formulated to cut grease aggressively — which means it strips your car’s protective wax coating. Always use a proper car-specific soap or a tested DIY formula.
❌ Washing in Circles
Circular scrubbing traps grit in your mitt and creates swirl marks that show up clearly in sunlight. Always use straight, overlapping strokes.
❌ One Bucket Washing
Using one bucket means you’re re-applying dirty water to your car. Always use the two-bucket method.
❌ Skipping the Wheels
Wheels carry brake dust — one of the most corrosive substances on your car. Always clean wheels last with a dedicated wheel brush and rinse thoroughly.
❌ Using Old Towels or Rags
Cotton rags, old T-shirts, and paper towels are too abrasive for car paint. Stick to quality microfiber products only.
Tips for a Streak-Free, Professional-Looking Finish
Want results that look like they came from a professional detailer? These tips make the difference:
- Use distilled water for the final rinse if your tap water is hard — it eliminates mineral water spots.
- Clay bar before waxing — After washing, a clay bar removes embedded contaminants that washing alone can’t get.
- Work one panel at a time — In hot weather especially, don’t let soap sit and dry.
- Detail the glass separately — Use a dedicated glass cleaner after washing for streak-free windows.
- Don’t forget the door jambs — Open all doors and wipe down the jambs and sills with a damp microfiber cloth.
According to Consumer Reports’ car care guide, using proper wash techniques and microfiber materials can preserve your vehicle’s resale value significantly over time.
When a Home Made Car Wash Isn’t Enough
Sometimes a home wash won’t cut it — and that’s okay. If your car has heavy contamination, deep stains, or you need interior detailing, a self-service facility with professional-grade equipment may be the better option.
If you’re wondering where to find one nearby, we’ve got you covered. Check out our guide on how to find a self-service car wash near you for a quick, easy method to locate the closest facilities with the best amenities.
You can also read our detailed walkthrough on how to find a do-it-yourself car wash in 5 steps to get pro-level results at a coin-op bay.
Home Made Car Wash Frequency: How Often Should You Wash?
The ideal frequency depends on your environment and driving habits.
| Situation | Recommended Frequency |
|---|---|
| Daily driver, urban area | Every 1–2 weeks |
| Garage-kept, light use | Every 3–4 weeks |
| Near coast or salted roads | Every week |
| After rain or dusty conditions | As needed, within 48 hours |
In general, washing your car every two weeks is the sweet spot for most drivers. Regular home made car wash sessions prevent dirt and contaminants from bonding to your paint and causing long-term damage.
For a deeper dive into advanced self-washing methods, read our 8-step method for a self car wash that covers everything from pre-soak to final detail.
The American Automobile Association (AAA) also recommends regular washing as part of routine vehicle maintenance — particularly in regions with harsh weather, road salt, or high pollen counts.
FAQ: Home Made Car Wash
1. Can I use dish soap for a home made car wash?
It’s not recommended. Dish soap strips the protective wax from your car’s paint and can dull the clear coat over time. Use a pH-neutral car soap or a tested DIY formula instead.
2. What is the best home made car wash soap recipe?
A reliable basic recipe is 1 gallon of warm water mixed with 2–3 tablespoons of a gentle, wax-safe liquid soap. For more advanced formulas — including ones with conditioning agents — see our home made car shampoo recipes.
3. How do I avoid water spots when doing a home made car wash?
Dry your car immediately after rinsing using a clean microfiber towel. Avoid washing in direct sunlight. If your tap water is hard, do a final rinse with distilled or filtered water.
4. Is a home made car wash safe for all vehicles?
Yes, when done correctly. The key is using the right tools (microfiber mitt and towels), a safe soap formula, and the two-bucket method. Avoid stiff brushes or rough materials that can scratch paint.
5. How often should I do a home made car wash?
Every 2 weeks is ideal for most vehicles. Wash more frequently if you drive in salty, dusty, or heavily polluted conditions — contaminants can etch into your paint if left too long.
6. Can I apply wax after a home made car wash?
Absolutely — and you should. Waxing after washing protects your clean paint from UV rays, water, and environmental damage. You can even make your own protective wax using our homemade car wax recipes.
Conclusion
A well-executed home made car wash is one of the simplest and most satisfying ways to care for your vehicle. With the right tools, a safe DIY soap formula, and the proper technique, you can achieve a spotless, professional-quality clean right in your own driveway — without the cost, wait, or risk of automated brushes.
Start with the two-bucket method, work top to bottom, dry thoroughly, and finish with a protective wax coat. Make it a regular habit, and your car’s paint will stay vibrant, protected, and looking like new for years to come.
Ready to get started? Gather your supplies, mix your home made car wash solution, and give your car the care it deserves — right at home, on your schedule.